GBP Management
Set up review requests for your Google Business Profile
Connect your business email, write the request email, set up the reminder and check the rating page, so you can start asking customers for Google reviews.
Updated October 31, 2026 · 6 min read
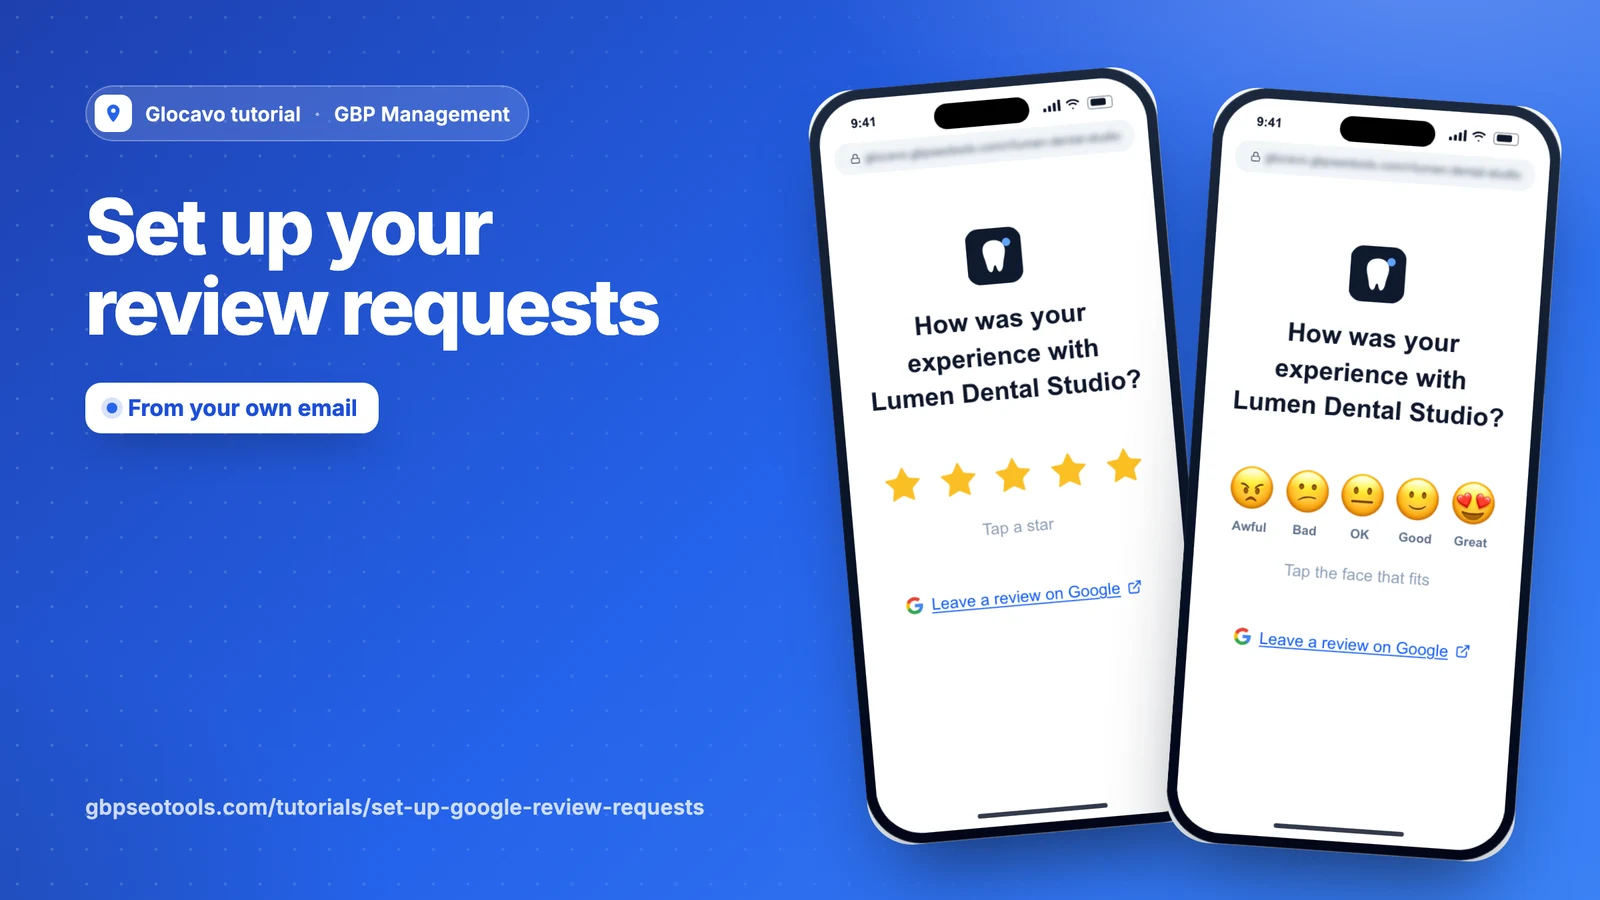
Review requests are emails asking your customers to rate you. They go out from your own address, never from Glocavo, so customers see it’s really you and replies land in your inbox. You set this up once, and every step already has sensible defaults.
- Where
- GBP Management, open a business, Get more reviews
- You need
- The business's email address, on a Google account or your own mail server
- Cost
- Setting up is included. Each Write with AI button costs 10 AI Power.
Start the setup
Click Get more reviews in the business menu. Until the setup is done, the page shows these steps in order, with the next one picked out. Click Start setup.
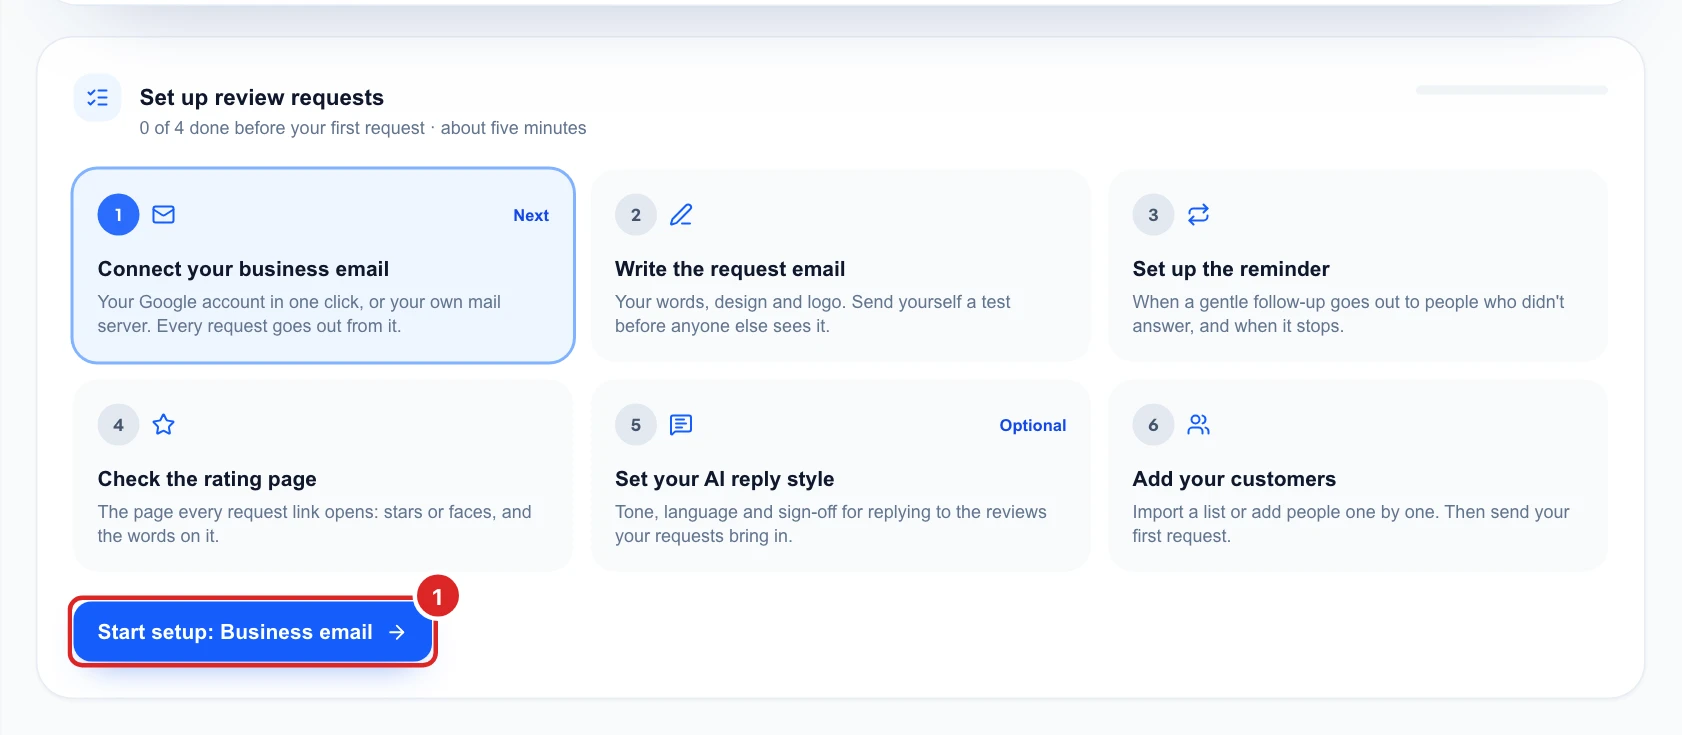
A bar at the top of each page shows where you are. Click any step to jump to it. If a page is fine as it is, Looks good, next marks it done and moves on, and saving a change there marks it done too.

Connect your business email
Every request goes out from this address, so choose the one your customers already know:
- Google account: click Sign in with the business’s Google account. It works with Gmail and Google Workspace. Glocavo can only send email as that address, and can’t read the inbox.
- Custom mail server: enter your own mailbox details if your email isn’t on Google.
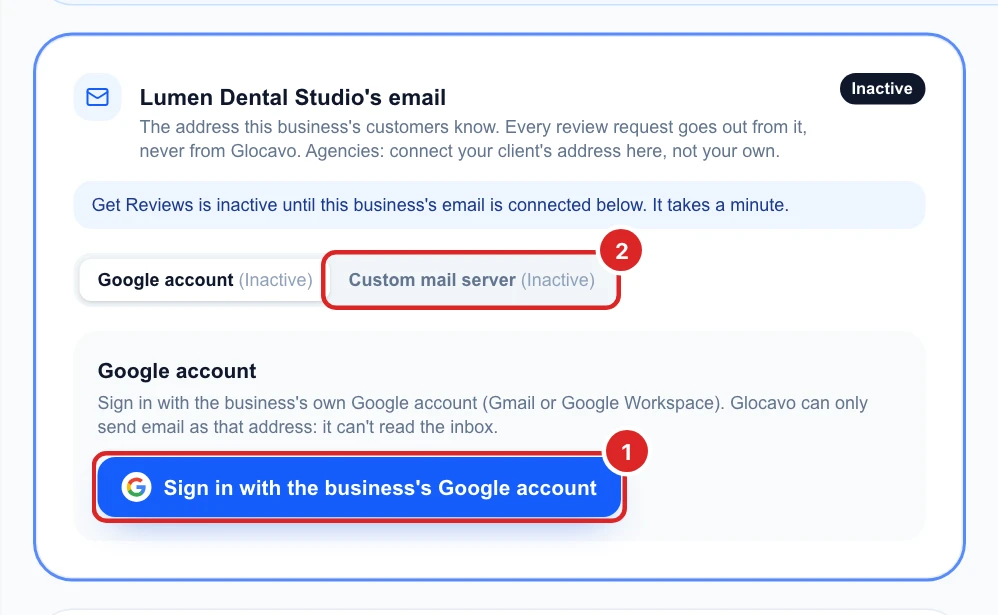
Agencies: connect your client’s address here, not your own. Requests can’t go out until an address is connected.
Write the request email
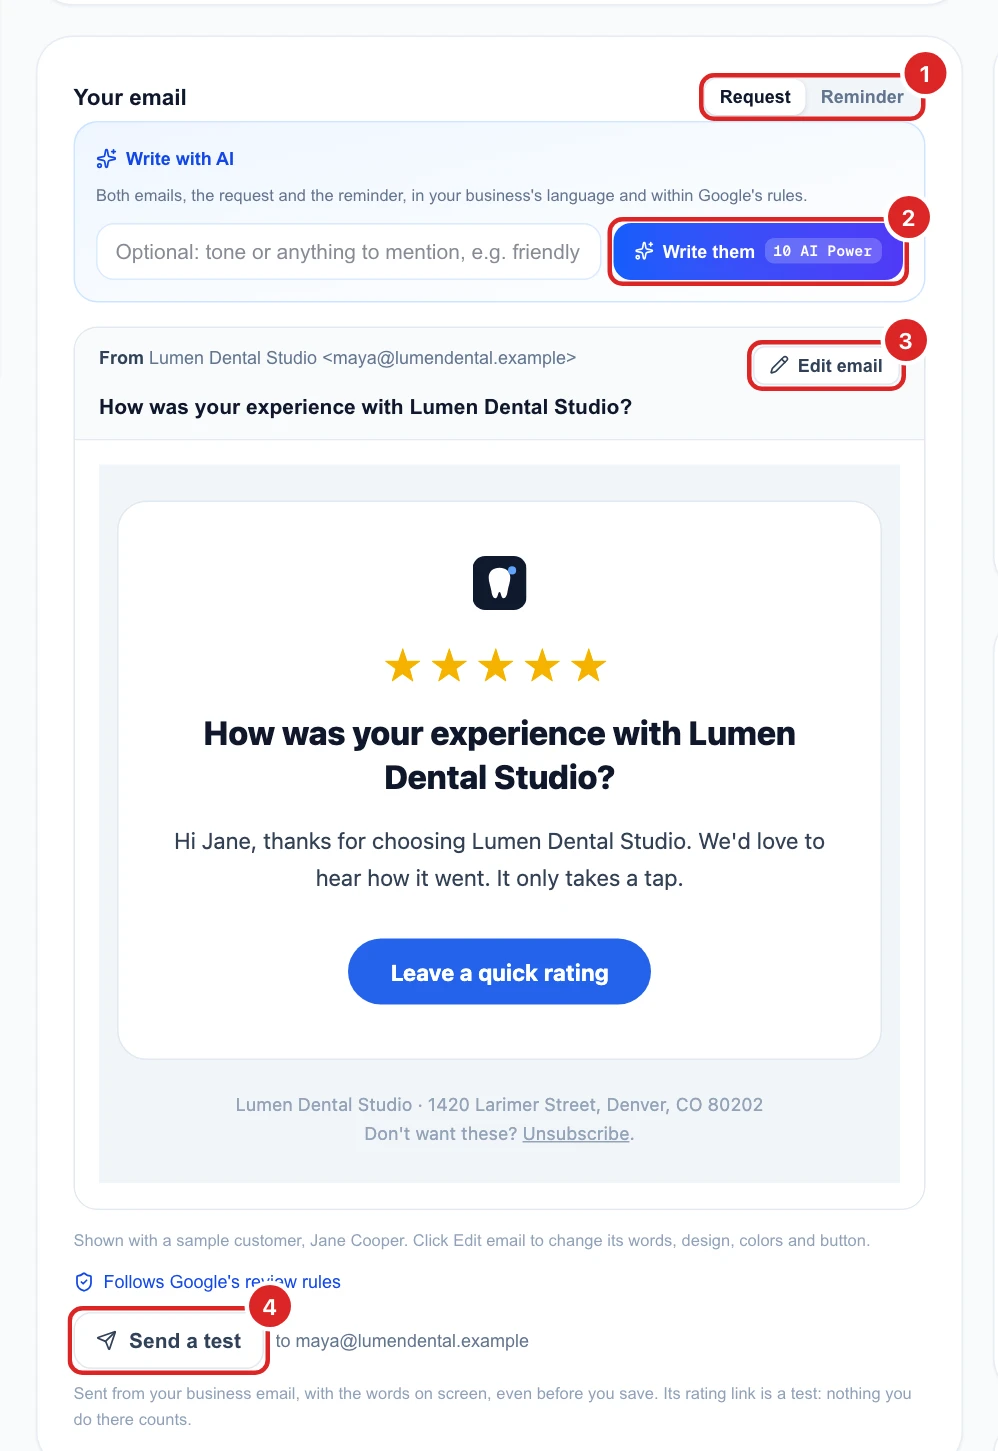
The preview shows the email as a customer gets it, with a sample customer’s name. You can send it as it is, or make it yours:
- Write them: AI writes the request and the reminder in your business’s language and within Google’s rules.
- Edit email: change its words, design, colors and button.
- Send a test: send it to yourself first. Its rating link is only a test, so nothing you do there counts.
Below the email, More in the email adds up to 3 small links, a picture and your name. Inbox check shows what keeps it in the inbox and within the law.
Set up the reminder
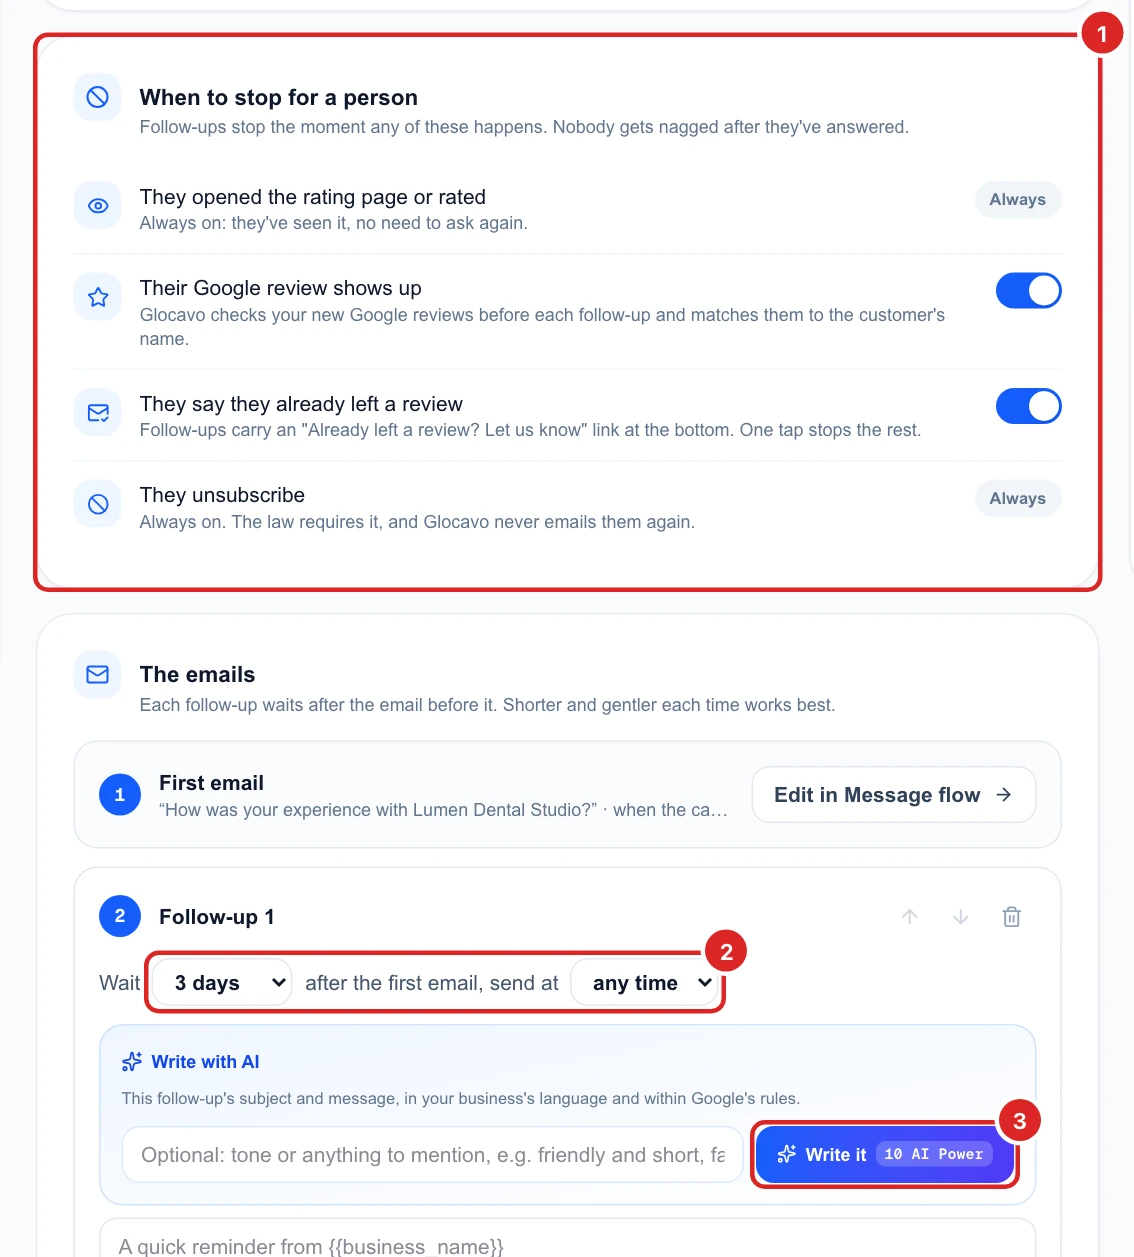
Open Follow-ups. By default, one reminder goes out 3 days after the first email, and you can have up to 3. Follow-ups only go to people who haven’t opened the rating page, in campaigns with follow-ups switched on.
For each one, pick how long to wait and what time to send it, then use the text shown or Write it with AI. Under When to stop for a person, choose whether to stop when their Google review shows up or when they say they already left one. Opening the rating page and unsubscribing always stop them.
Check the rating page
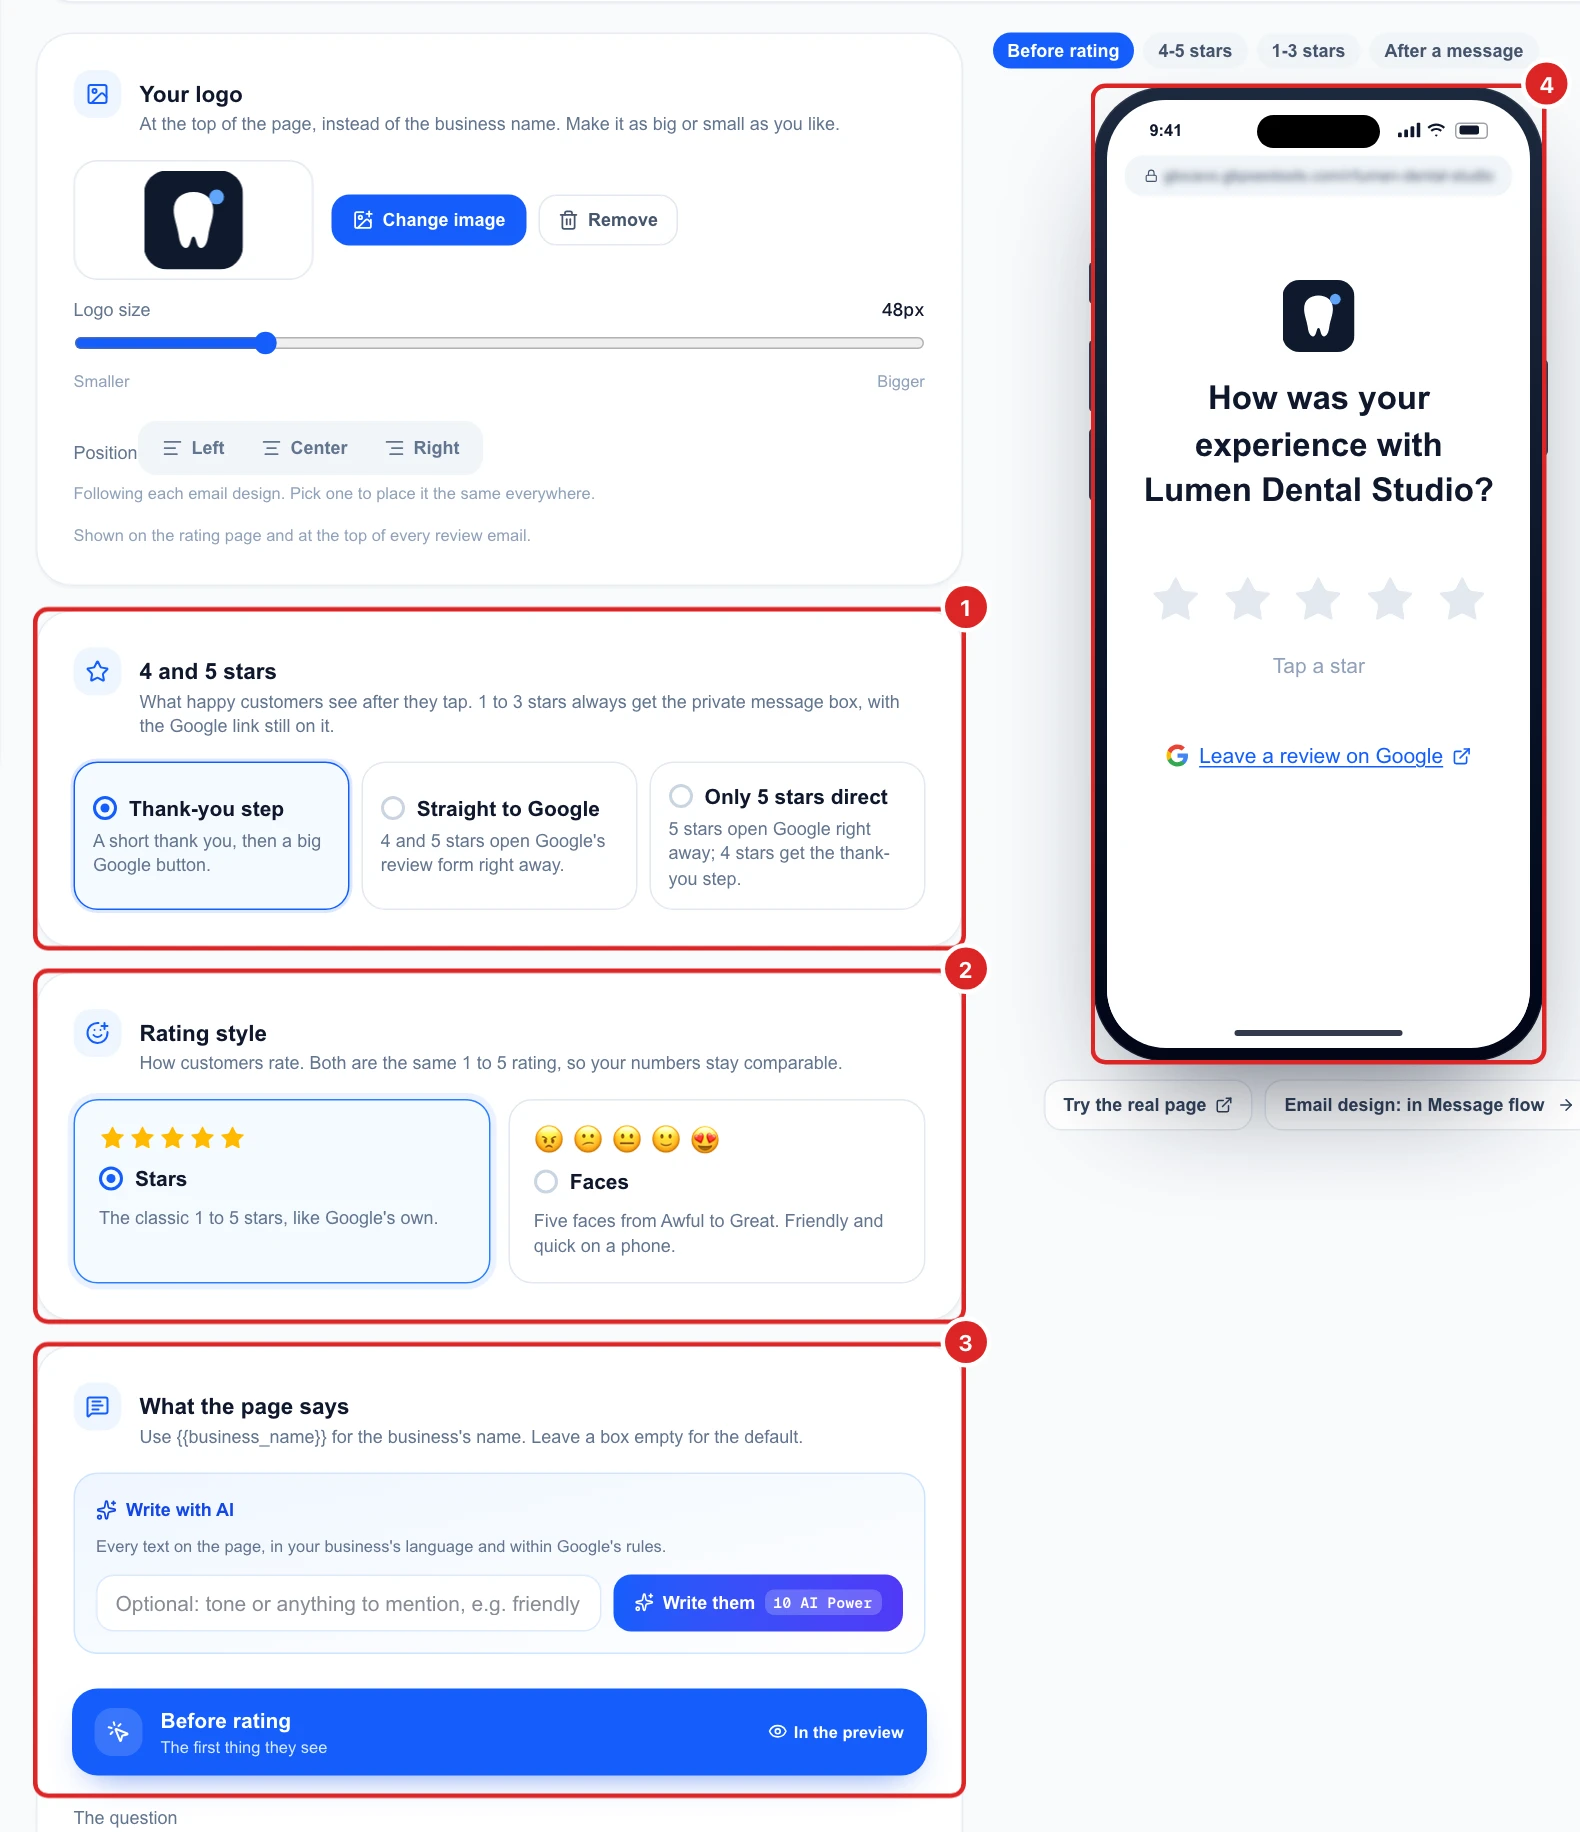
This is the page every email and QR code opens. Customers rate first, then 4 and 5 stars go on to Google, and 1 to 3 stars can send you a private message. The Google link stays on every step, whatever the rating.
- 4 and 5 stars: show a thank-you step, go straight to Google’s form, or do that only for 5 stars.
- Rating style: stars or faces.
- What the page says: leave a box empty for the default, or use Write them with AI. The phone beside it shows each step as you type.
Prefer no rating step? Switch off Rating page on, and every link goes straight to Google’s review form.
Finish the setup
The last step, AI replies, is optional: it sets how AI answers the reviews your requests bring in. See reply to your Google reviews. Click Skip for now or Looks good, finish and you’re back on the list.
Once your email is connected, you can also click Send with the defaults on that page to start without finishing every step. Next, add your customers and send your first request.