AI Visibility
Create an AI Visibility campaign
Find out if ChatGPT, Perplexity, Gemini, Claude and Google's AI recommend your business: find your listing, review the questions Glocavo writes, set a schedule and launch your first scan.
Updated September 28, 2026 · 7 min read
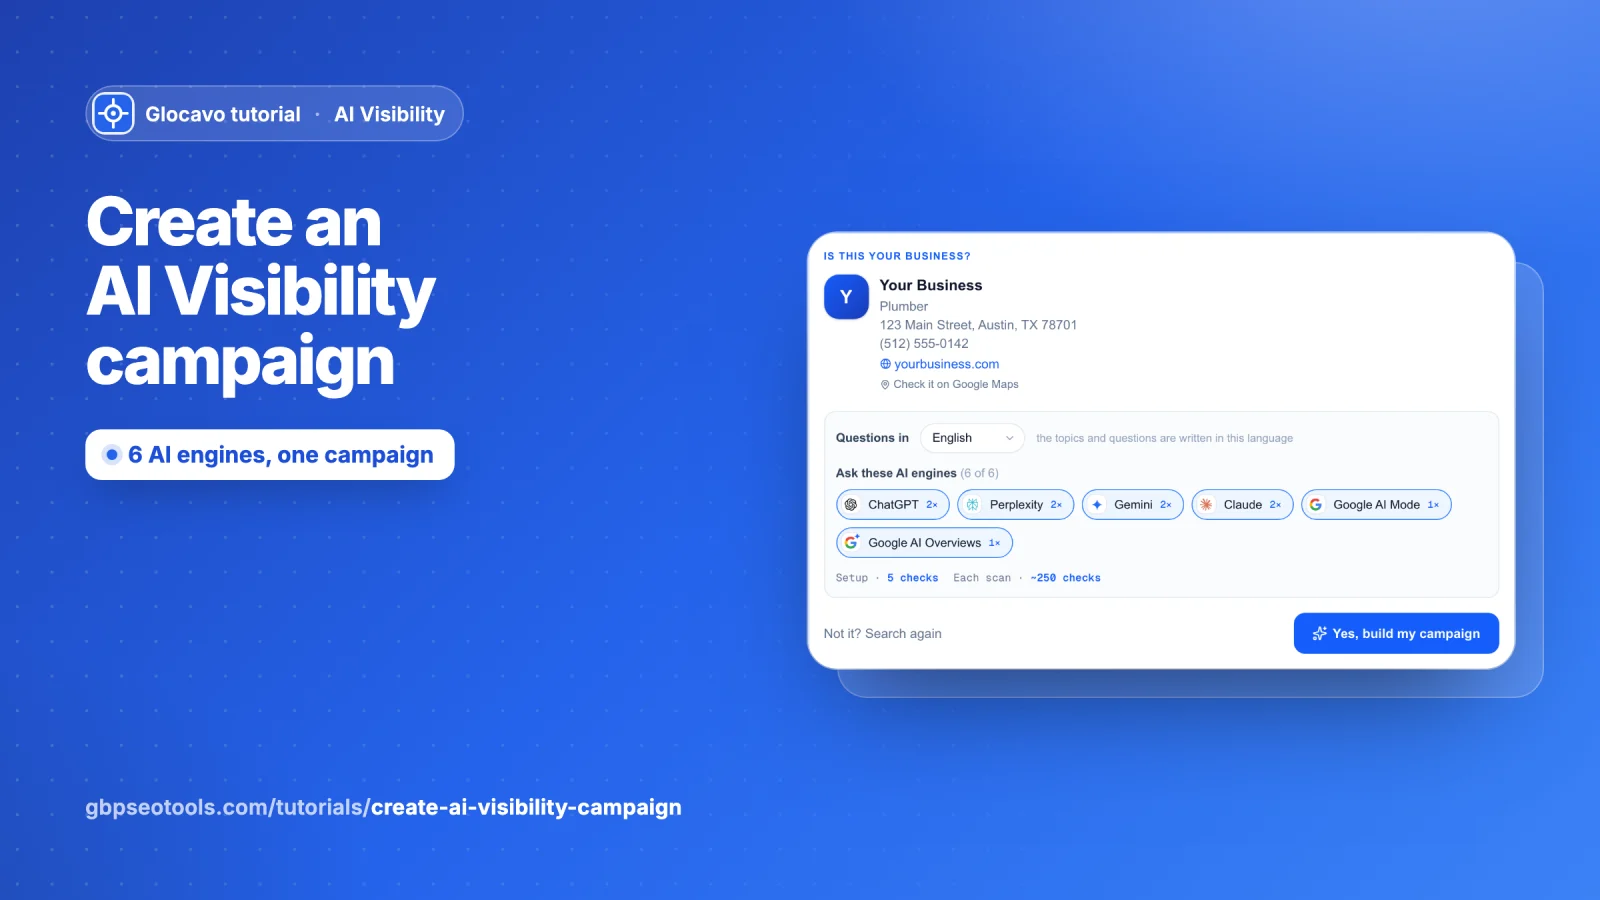
An AI Visibility campaign checks whether AI assistants recommend your business when customers ask them for one. Glocavo writes the questions your customers really ask, asks them to up to six AI engines, and shows how often you are named, in what position, who is named instead of you, and which sites the answers rely on.
The screenshots below use a made-up plumber called Your Business in Austin, TX. Your screens show your own business, topics and competitors.
- Where
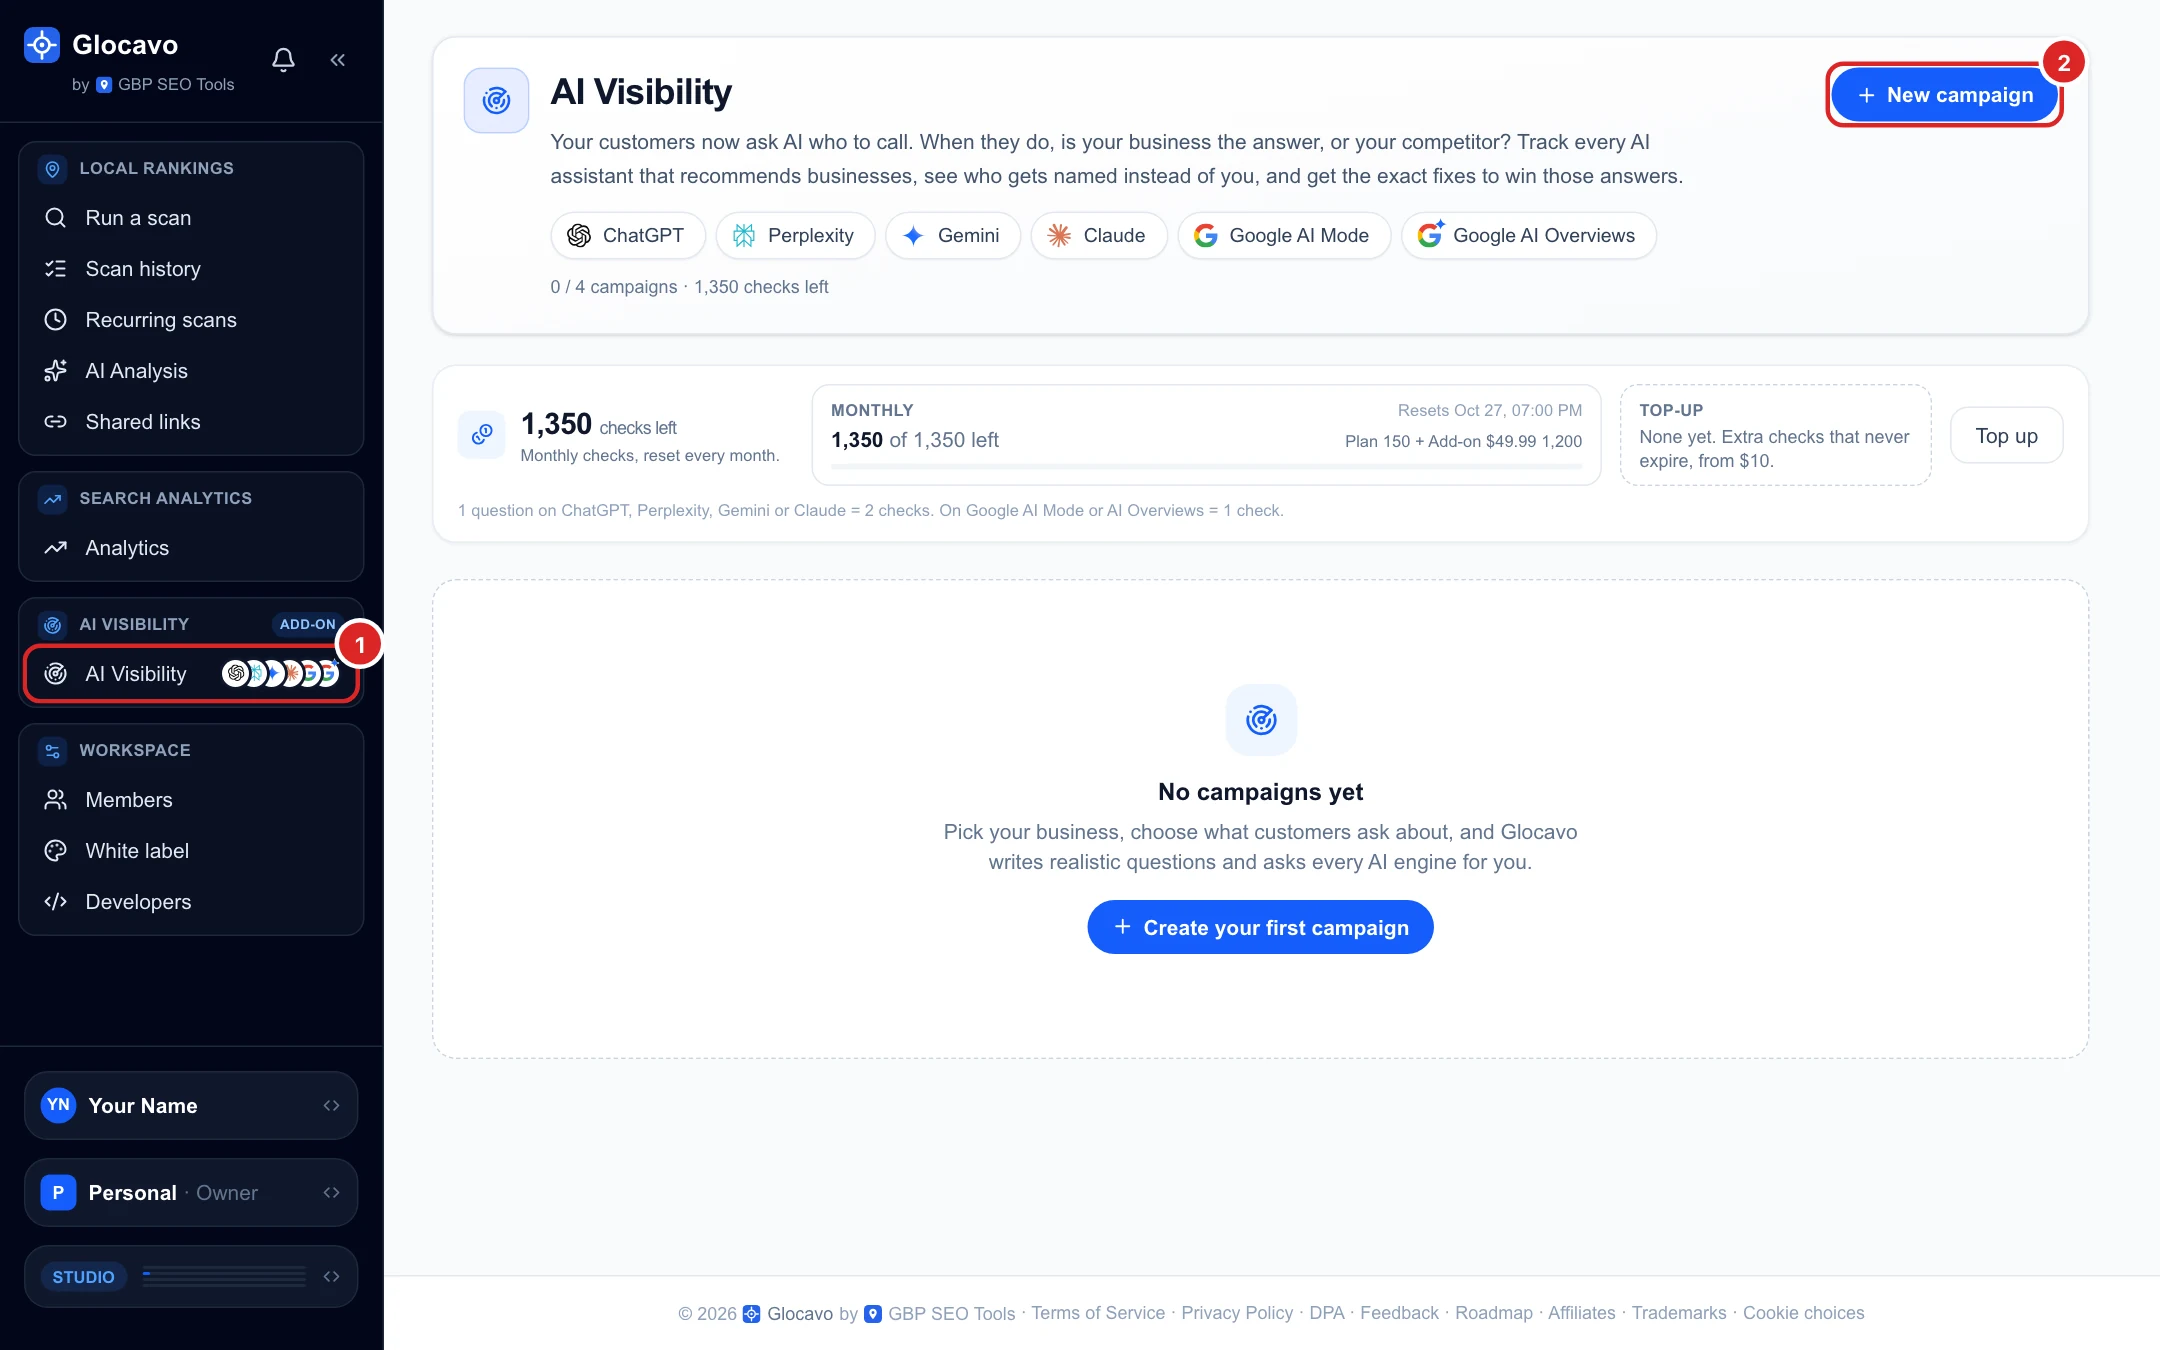
- Glocavo → AI Visibility in the left sidebar → New campaign.
- Who
- Every paid plan includes one campaign with a monthly scan. The AI Visibility add-on ($29.99, $49.99 or $99.99 a month) adds more campaigns, questions and checks, on any plan.
- Cost
- Building the campaign with AI uses 5 checks. Each scan uses 2 checks per question on ChatGPT, Perplexity, Gemini and Claude, and 1 on Google AI Mode and AI Overviews: 10 checks per question on all six.
Open AI Visibility and start a new campaign
In Glocavo, click AI Visibility in the left sidebar. The page shows how many checks you have left this month and how many campaigns your plan allows. Click New campaign (or Create your first campaign if you have none yet).
Find your business
Type your business name as it appears on Google and pick it from the list. You can also paste your website, a Google Maps link or a Place ID into the same box, then click Find my business.
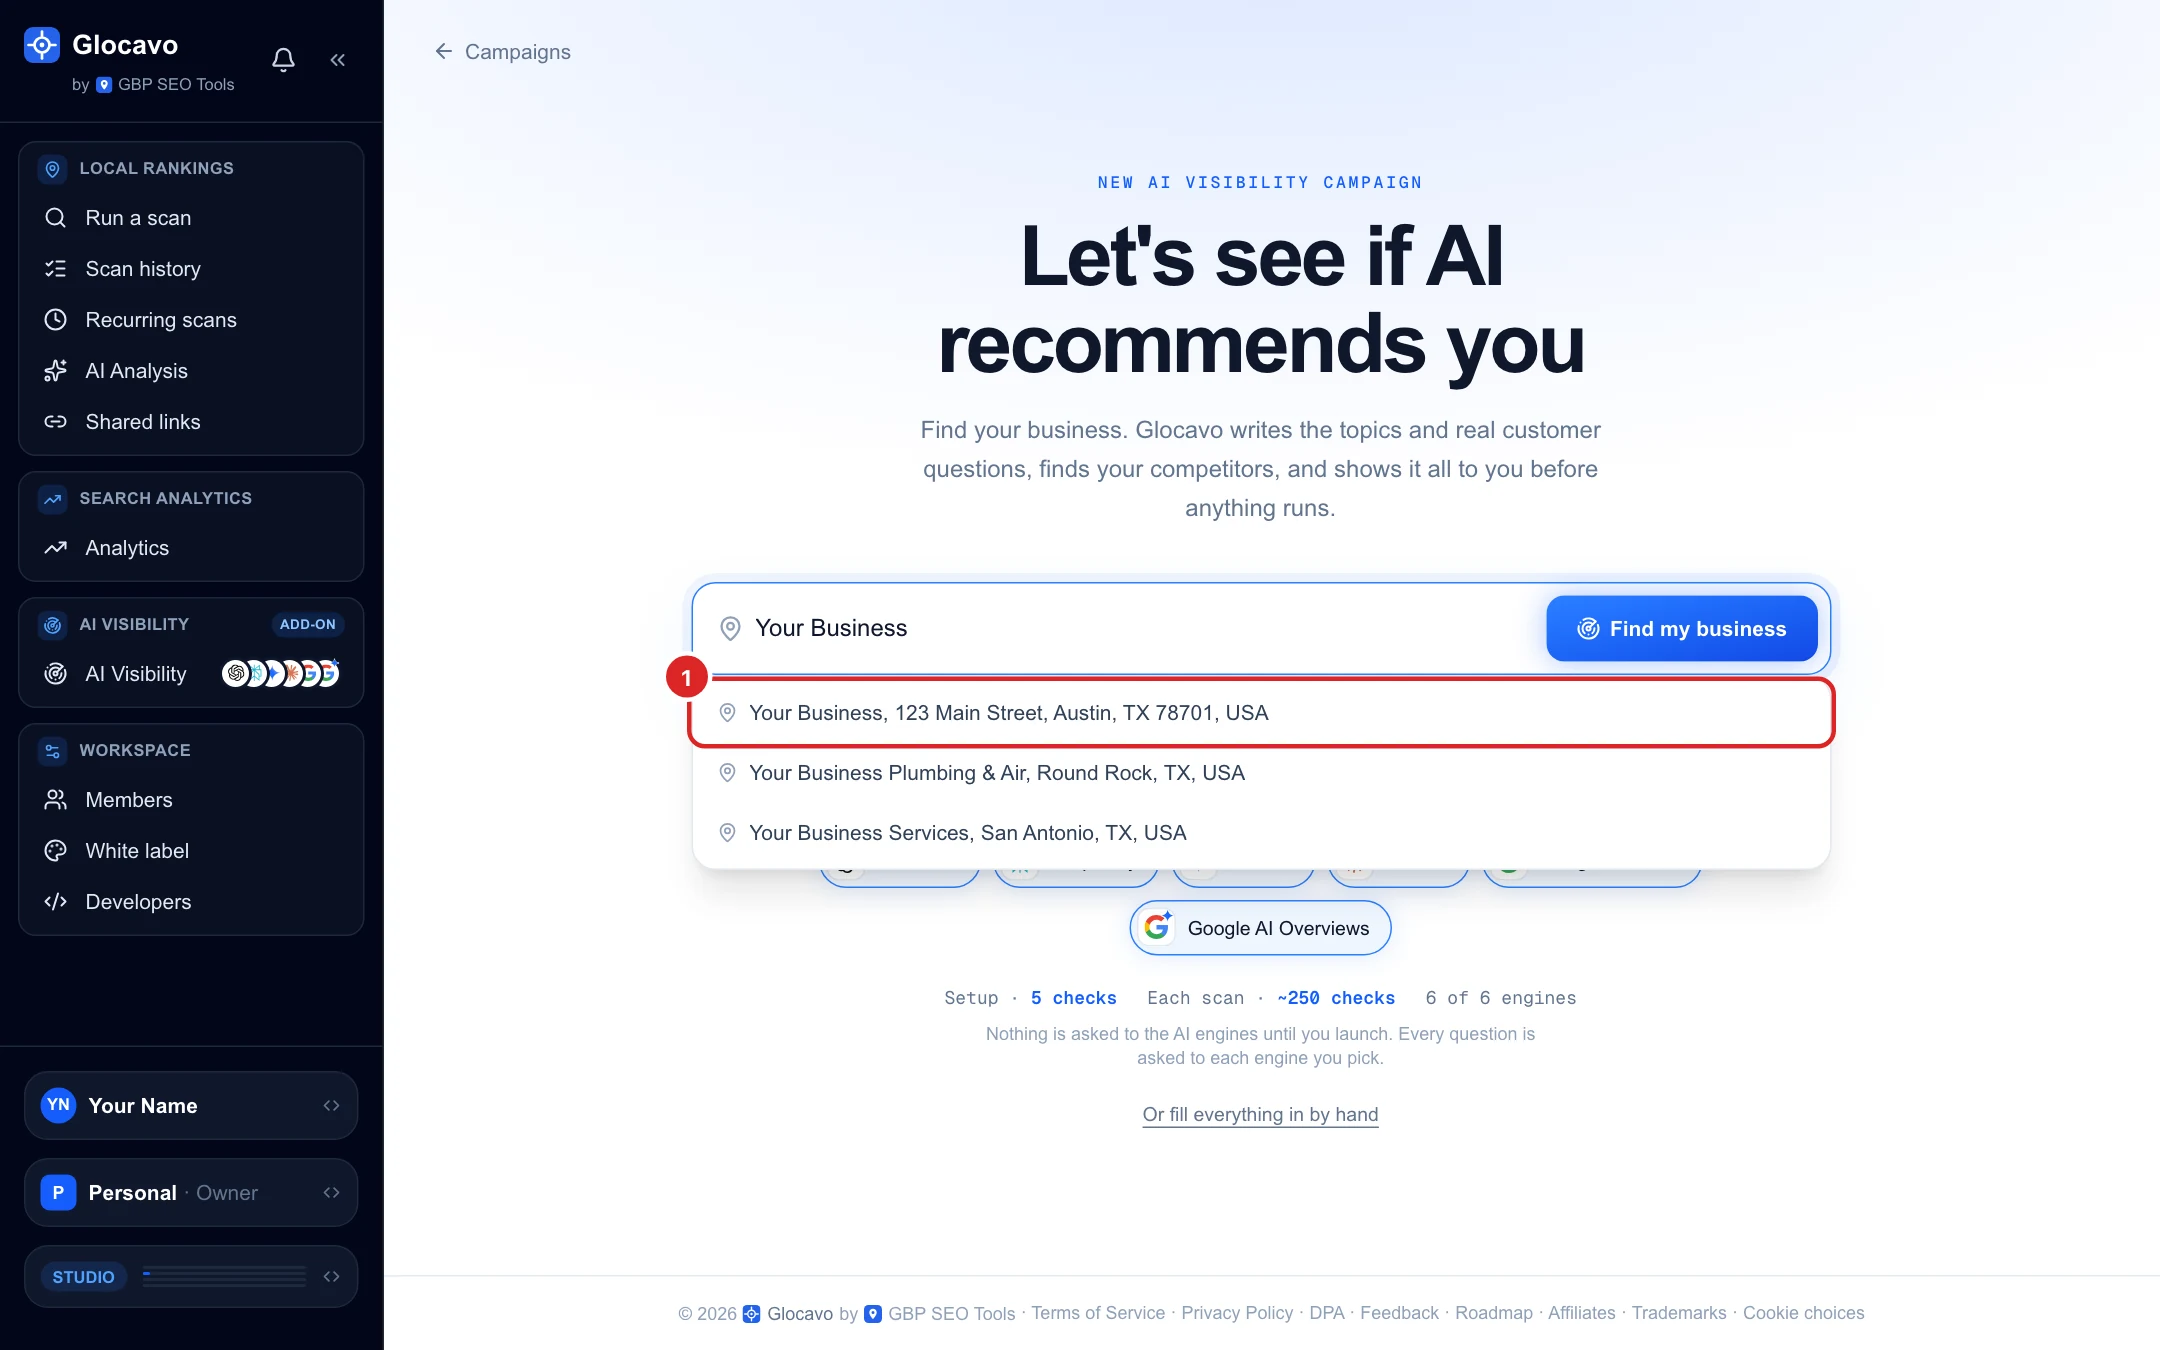
Service-area business that does not show up in the list? Paste your Google Maps link or Place ID instead. No Google listing at all? Paste your website, or use Or fill everything in by hand under the box. Filling it in by hand does not use the 5 setup checks.
Confirm it is your business and pick the AI engines
Glocavo shows the listing it found: category, address, phone and website. Check it is the right one (Check it on Google Maps opens it), then choose:
- Questions in: the language Glocavo writes the topics and questions in, and so the language the AI engines are asked in. Pick the language your customers search in: English, Spanish, French, German, Italian, Portuguese, Dutch, Polish, Romanian, Russian, Ukrainian or Turkish.
- Ask these AI engines: ChatGPT, Perplexity, Gemini, Claude, Google AI Mode and Google AI Overviews. All six are on by default. Each chip shows its cost per question (2× or 1×). Click one to turn it off if you want to save checks.
Then click Yes, build my campaign. If it is the wrong business, click Not it? Search again.
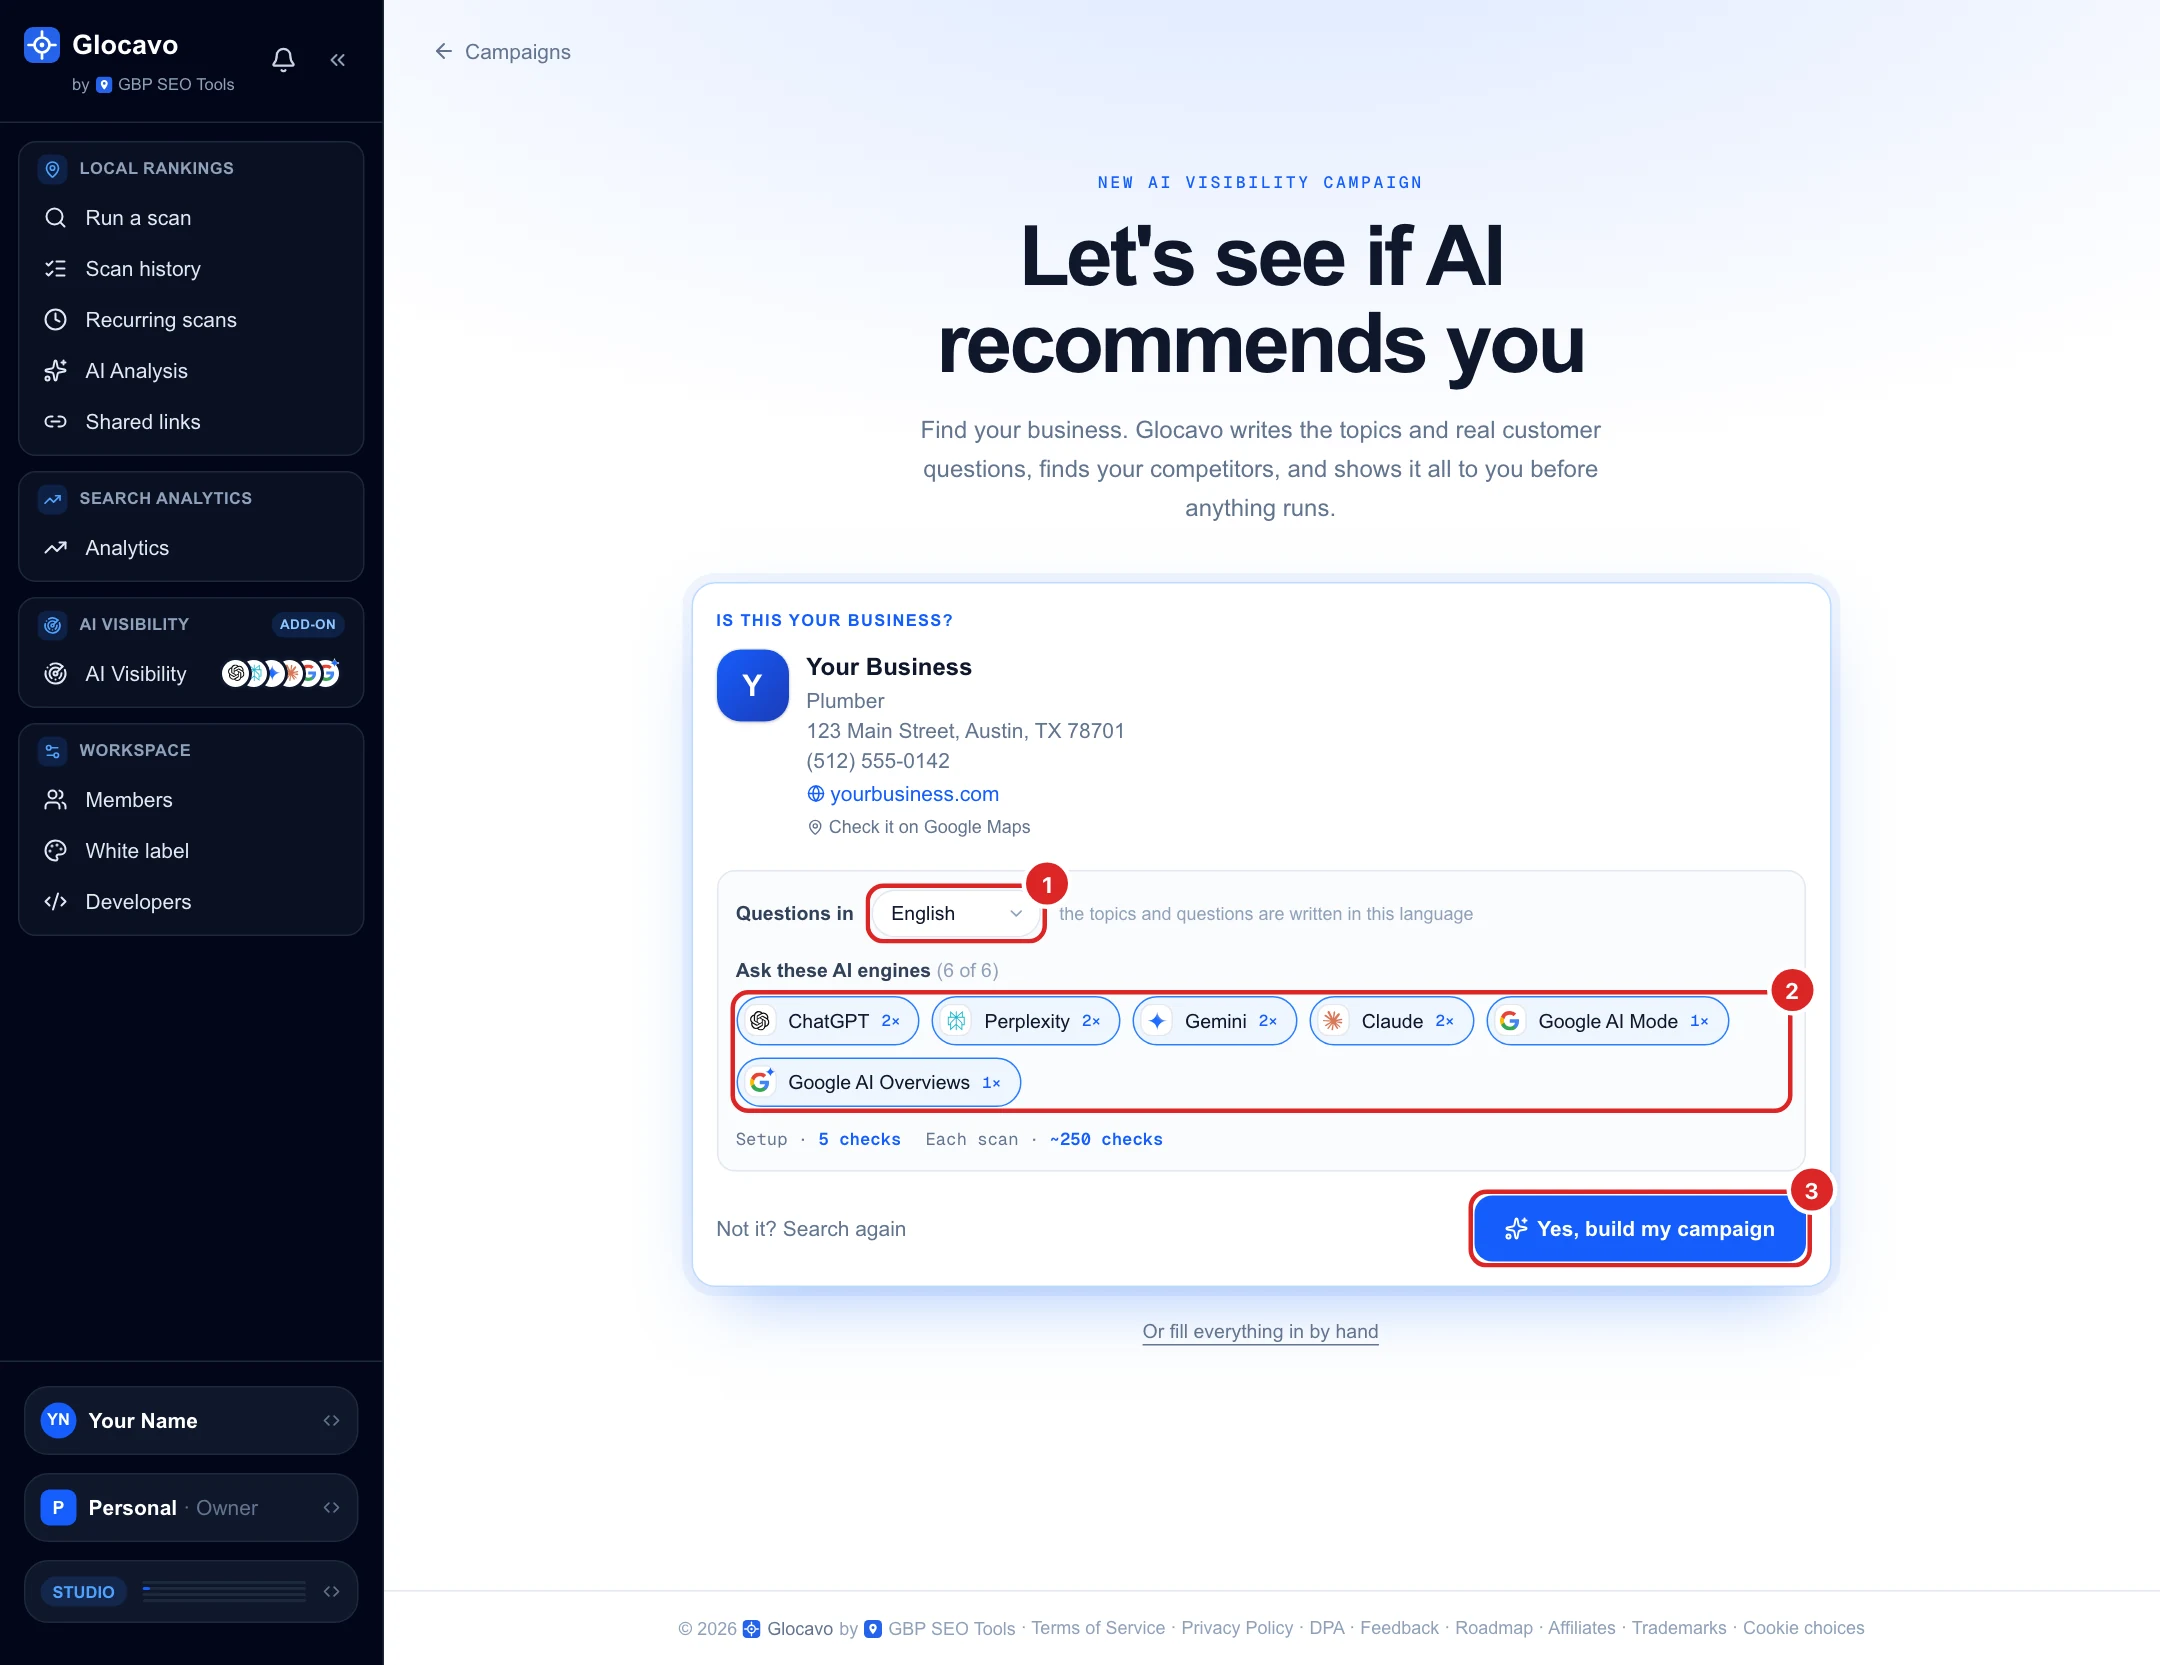
Choose the language before you build: the topics and questions are written in it. You can change the language later (Edit on the review page, or the campaign’s Settings), but that only applies to questions you add or generate from then on. Questions already written stay as they are. For customers who search in two languages, create one campaign per language.
Let Glocavo build the campaign
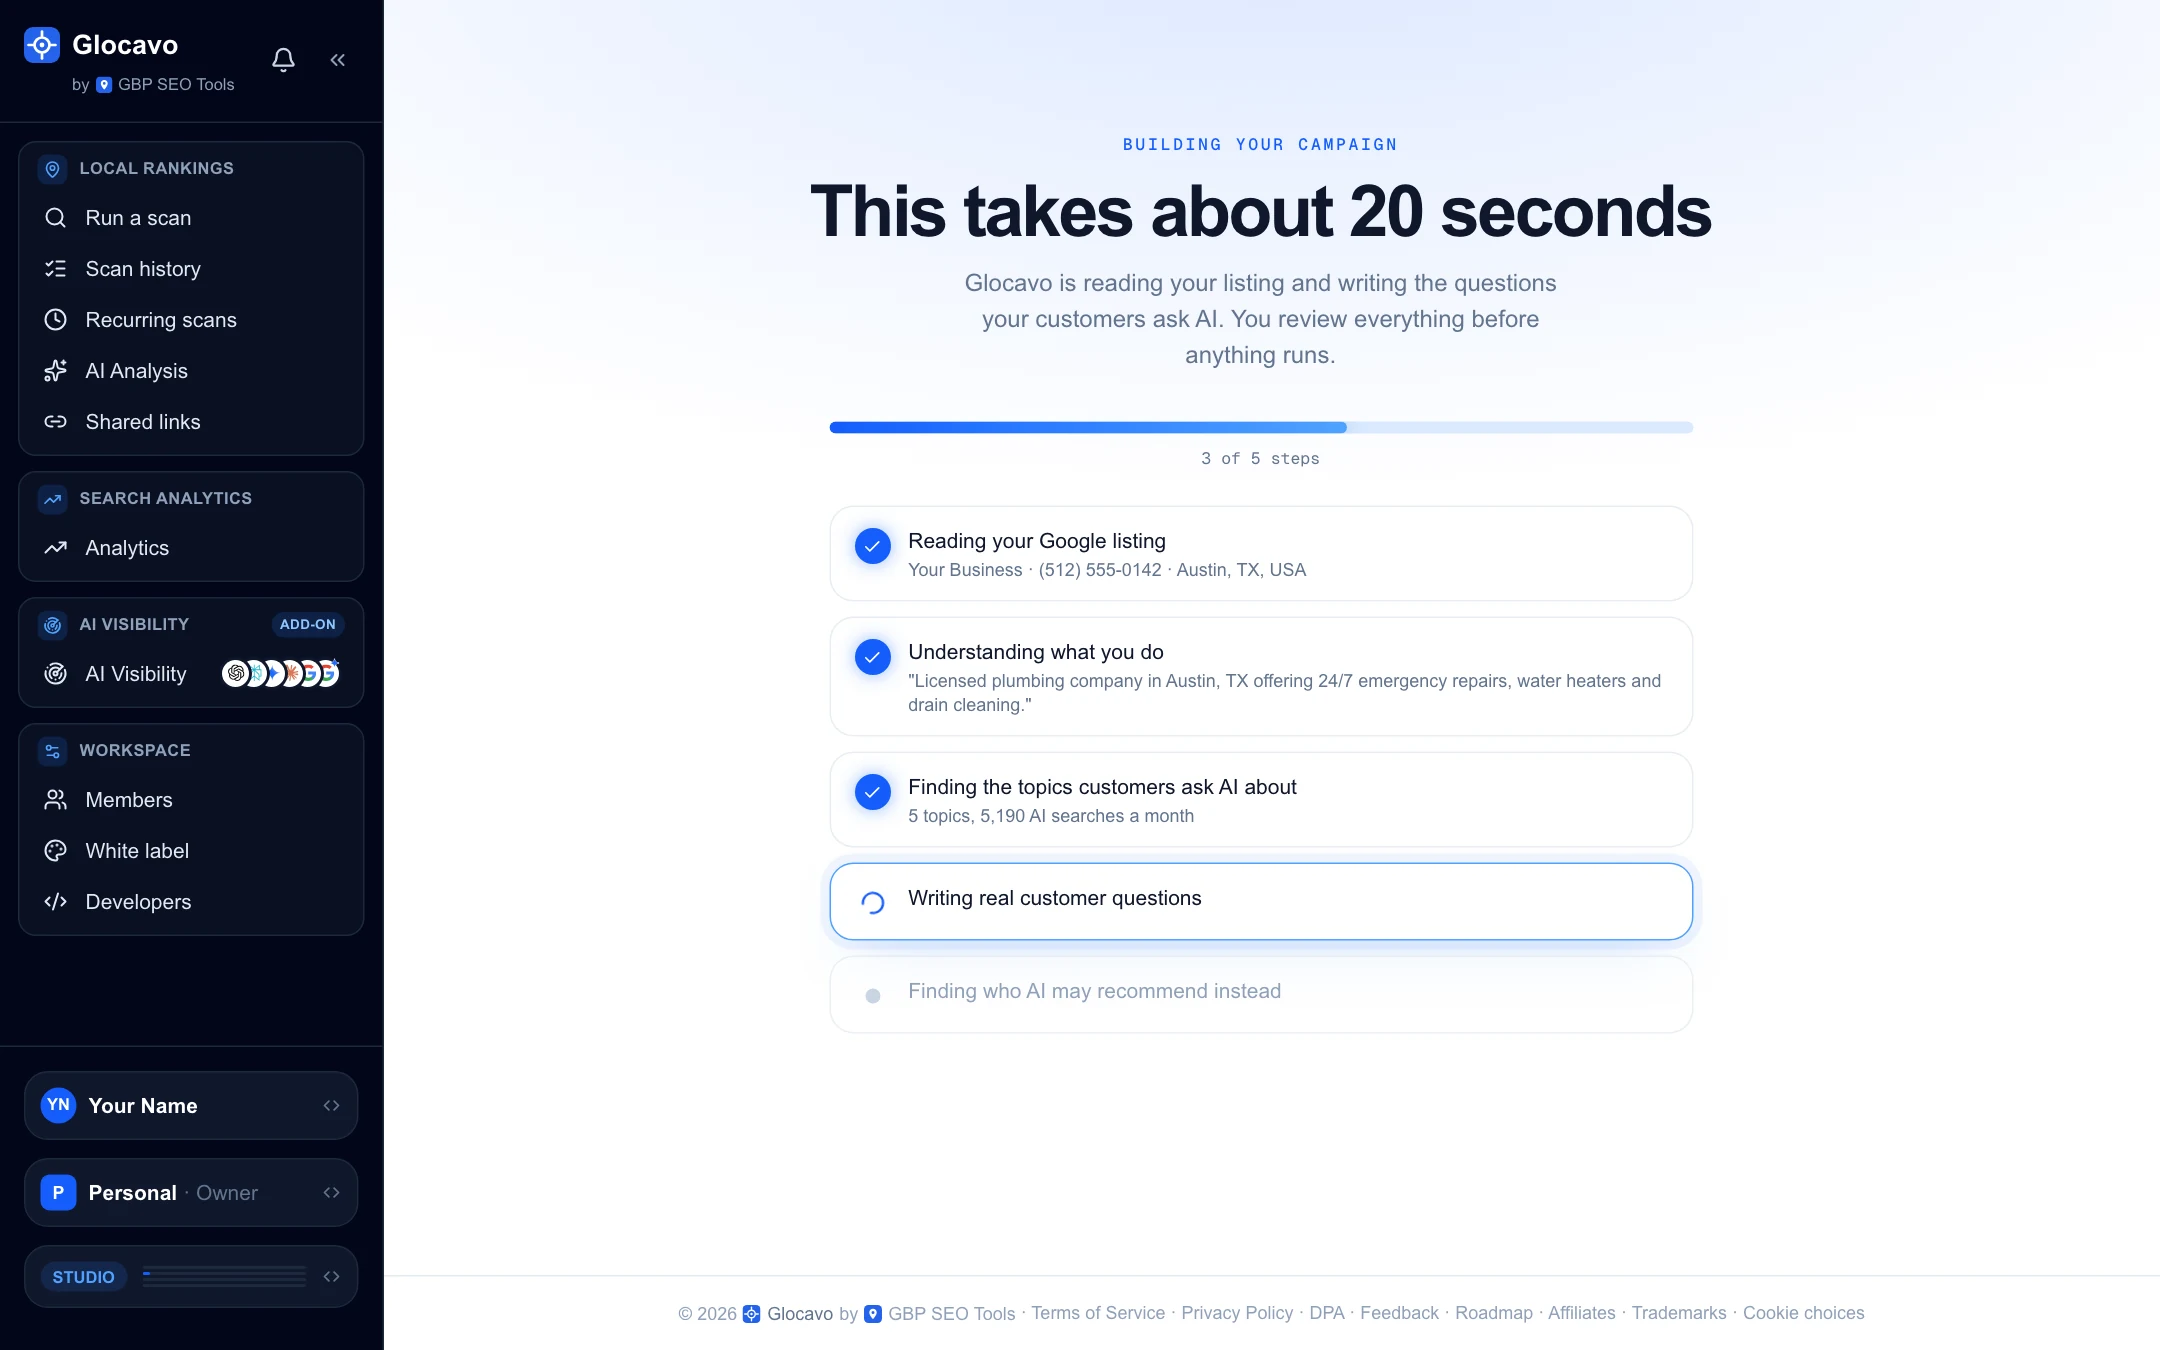
Glocavo now reads your Google listing, works out what you do, finds the topics customers ask AI about (with how many AI searches each gets a month), writes real customer questions for each topic and finds the businesses AI may recommend instead of you.
Review your business and the questions
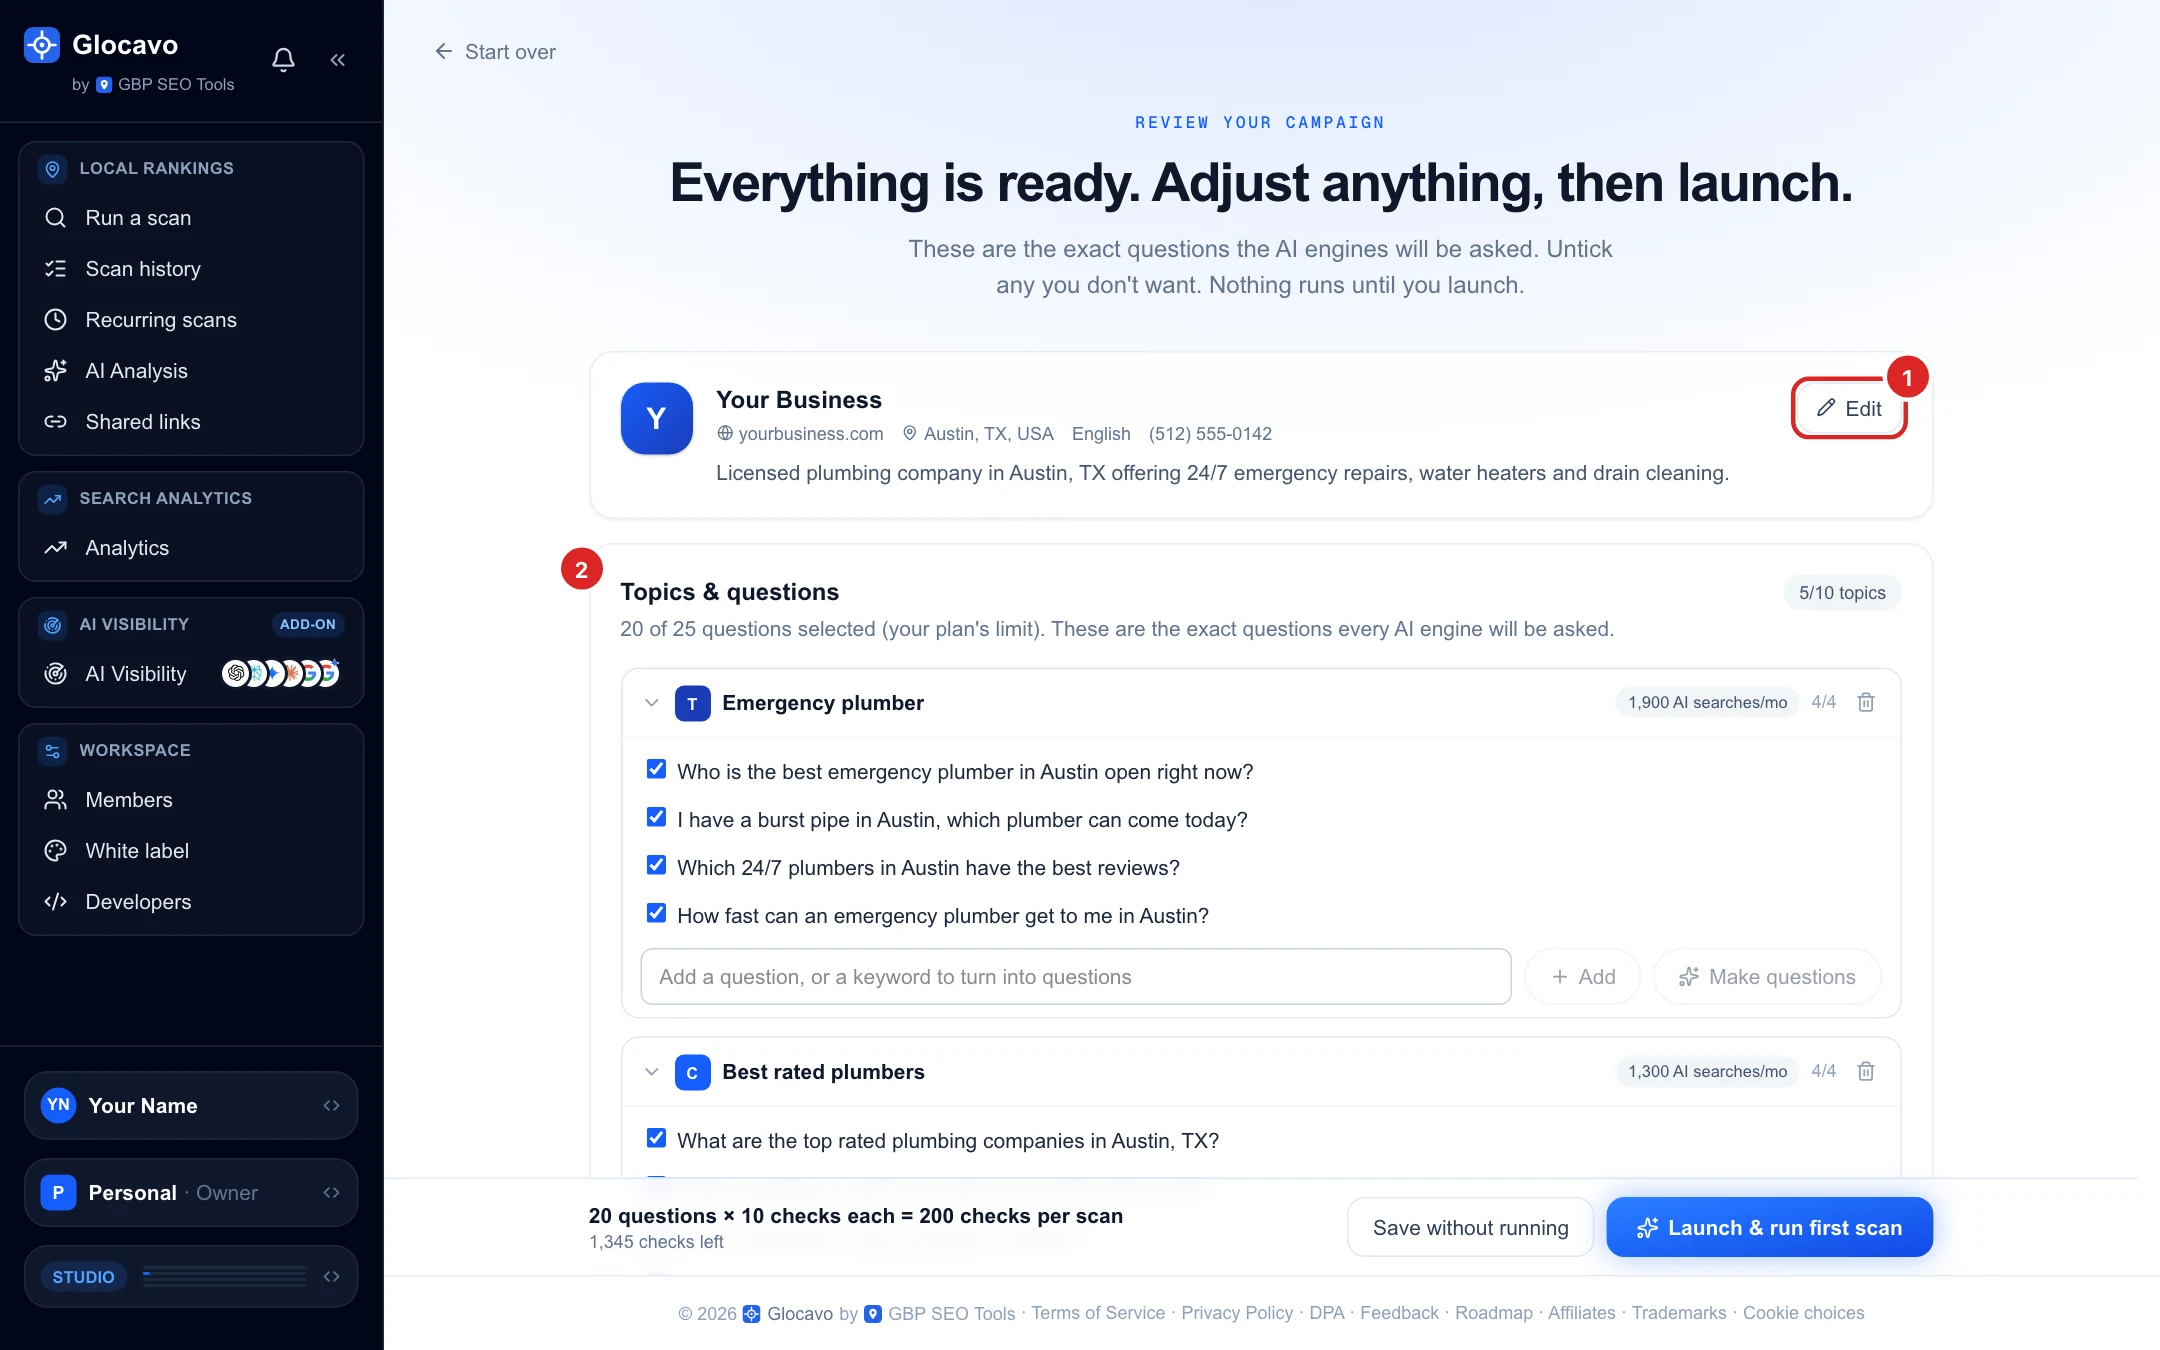
Everything Glocavo prepared is on one review page. Nothing has run yet, so change whatever you like.
- Your business: click Edit to change the name, website, the one-line description, other names AI might use (short names, spellings, your domain), the target location, the question language and the campaign name. A mention under a spelling that is not listed there may not be credited to you.
- Topics & questions: each topic has an intent badge (T transactional, C commercial, I informational, N navigational), its monthly AI searches and up to 5 questions. The header shows how many questions are selected out of your plan’s limit.
Untick, add or remove questions
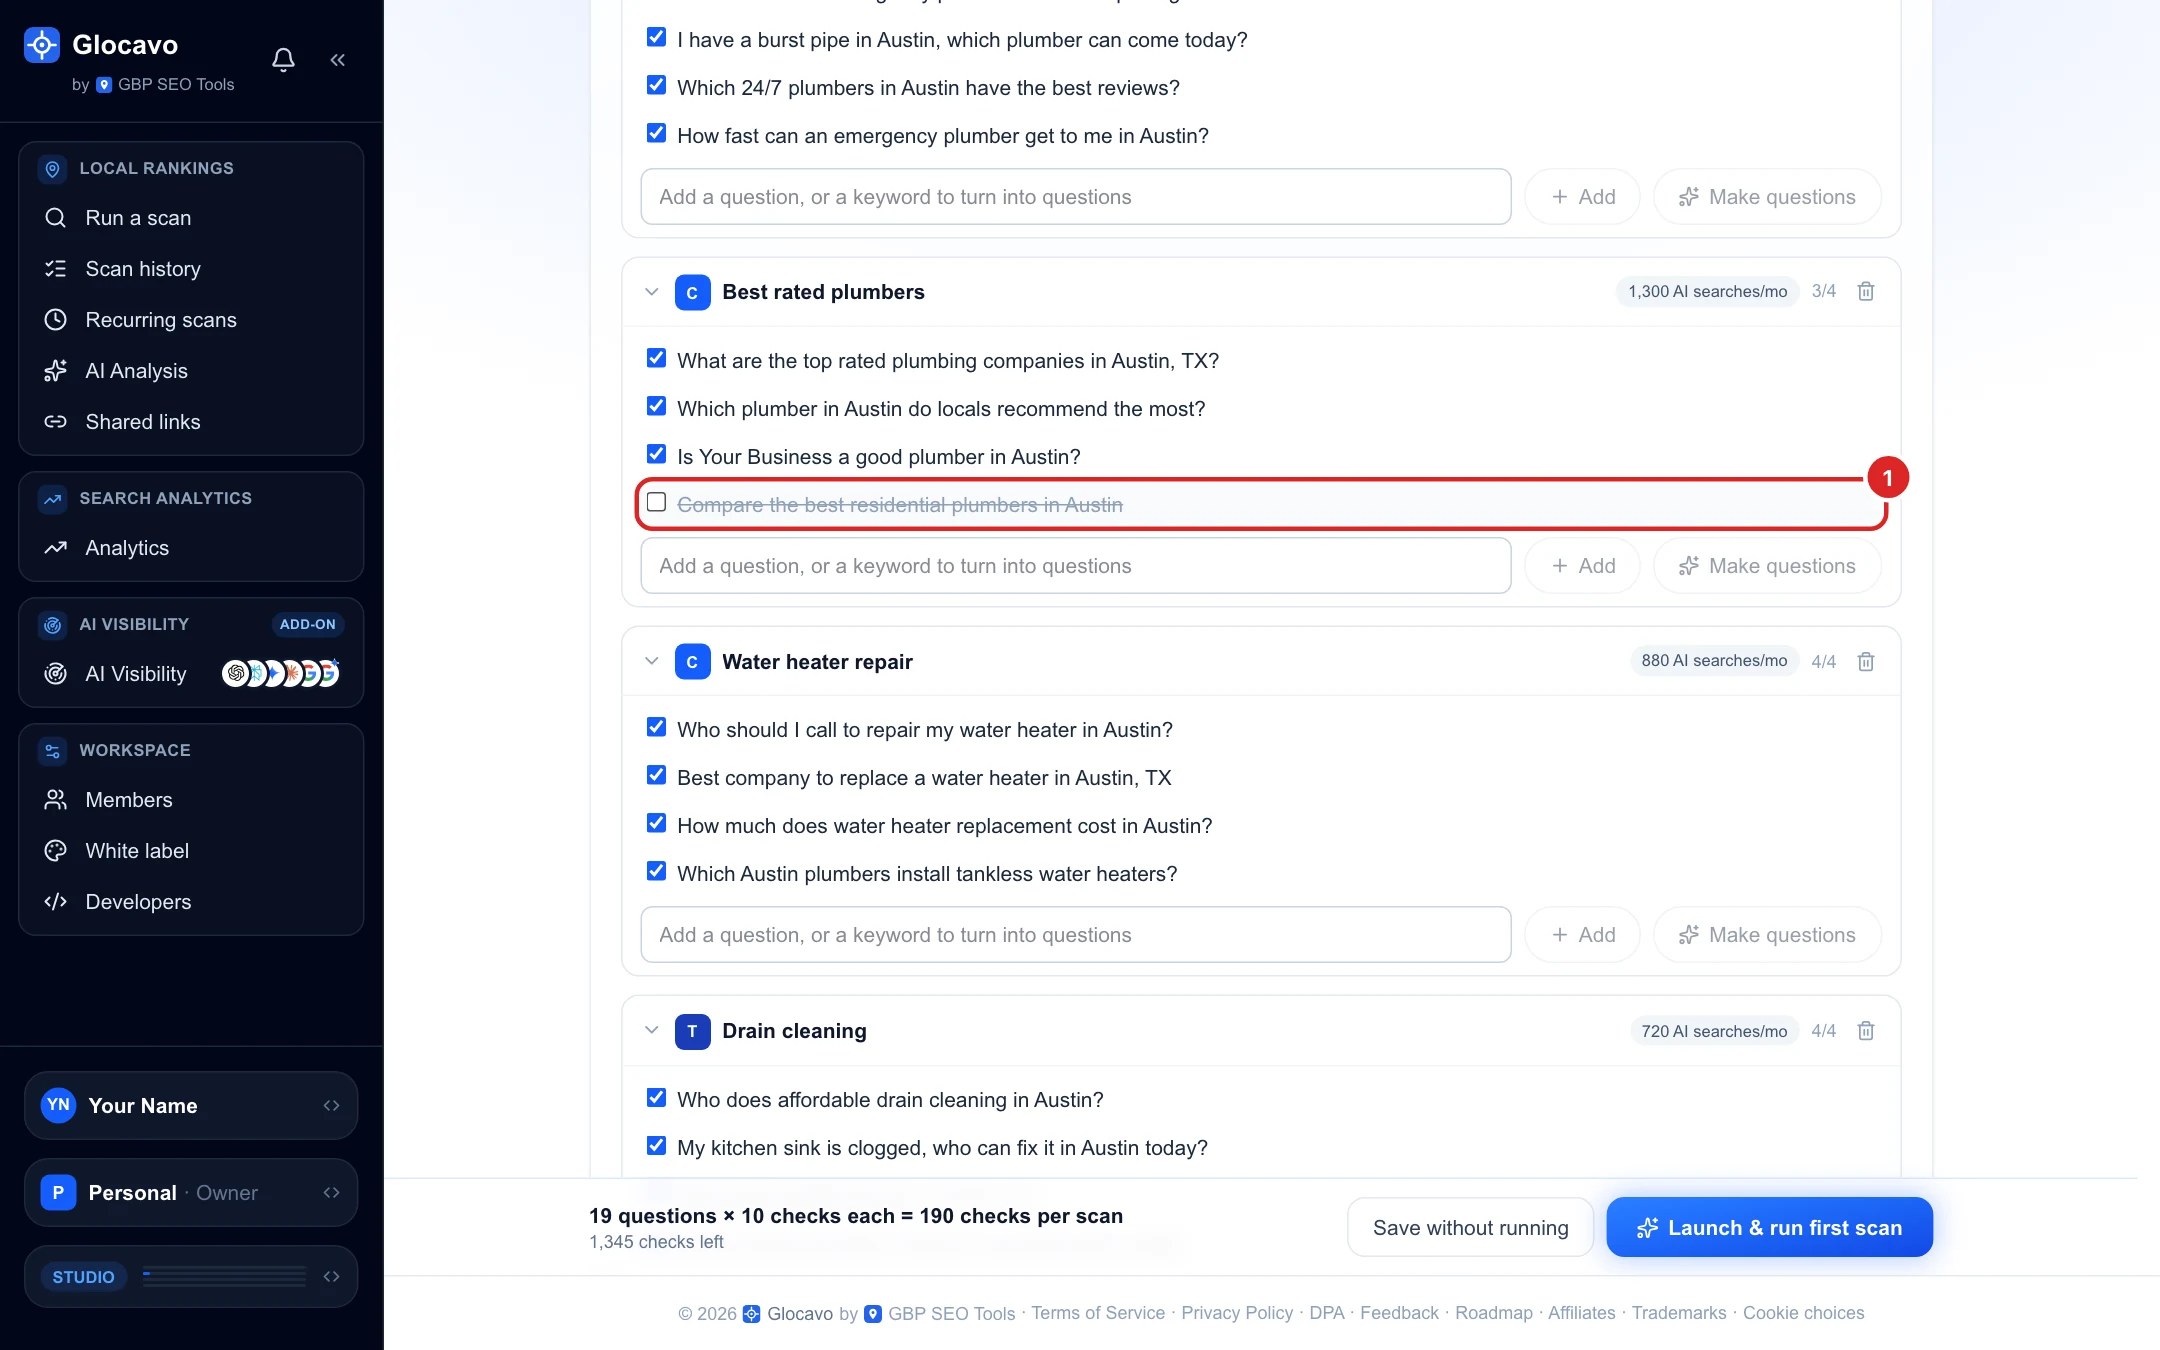
These are the exact questions every AI engine will be asked, so keep the ones your customers would really type:
- Untick a question to leave it out. It stays in the list, crossed out, in case you change your mind.
- Type your own question in the box under a topic and click Add, or type a keyword and click Make questions to have Glocavo turn it into questions.
- Click the bin icon to remove a whole topic. Under the last topic you can add one of the More ideas topics or type your own (up to 10 topics).
Set competitors and the schedule, then launch
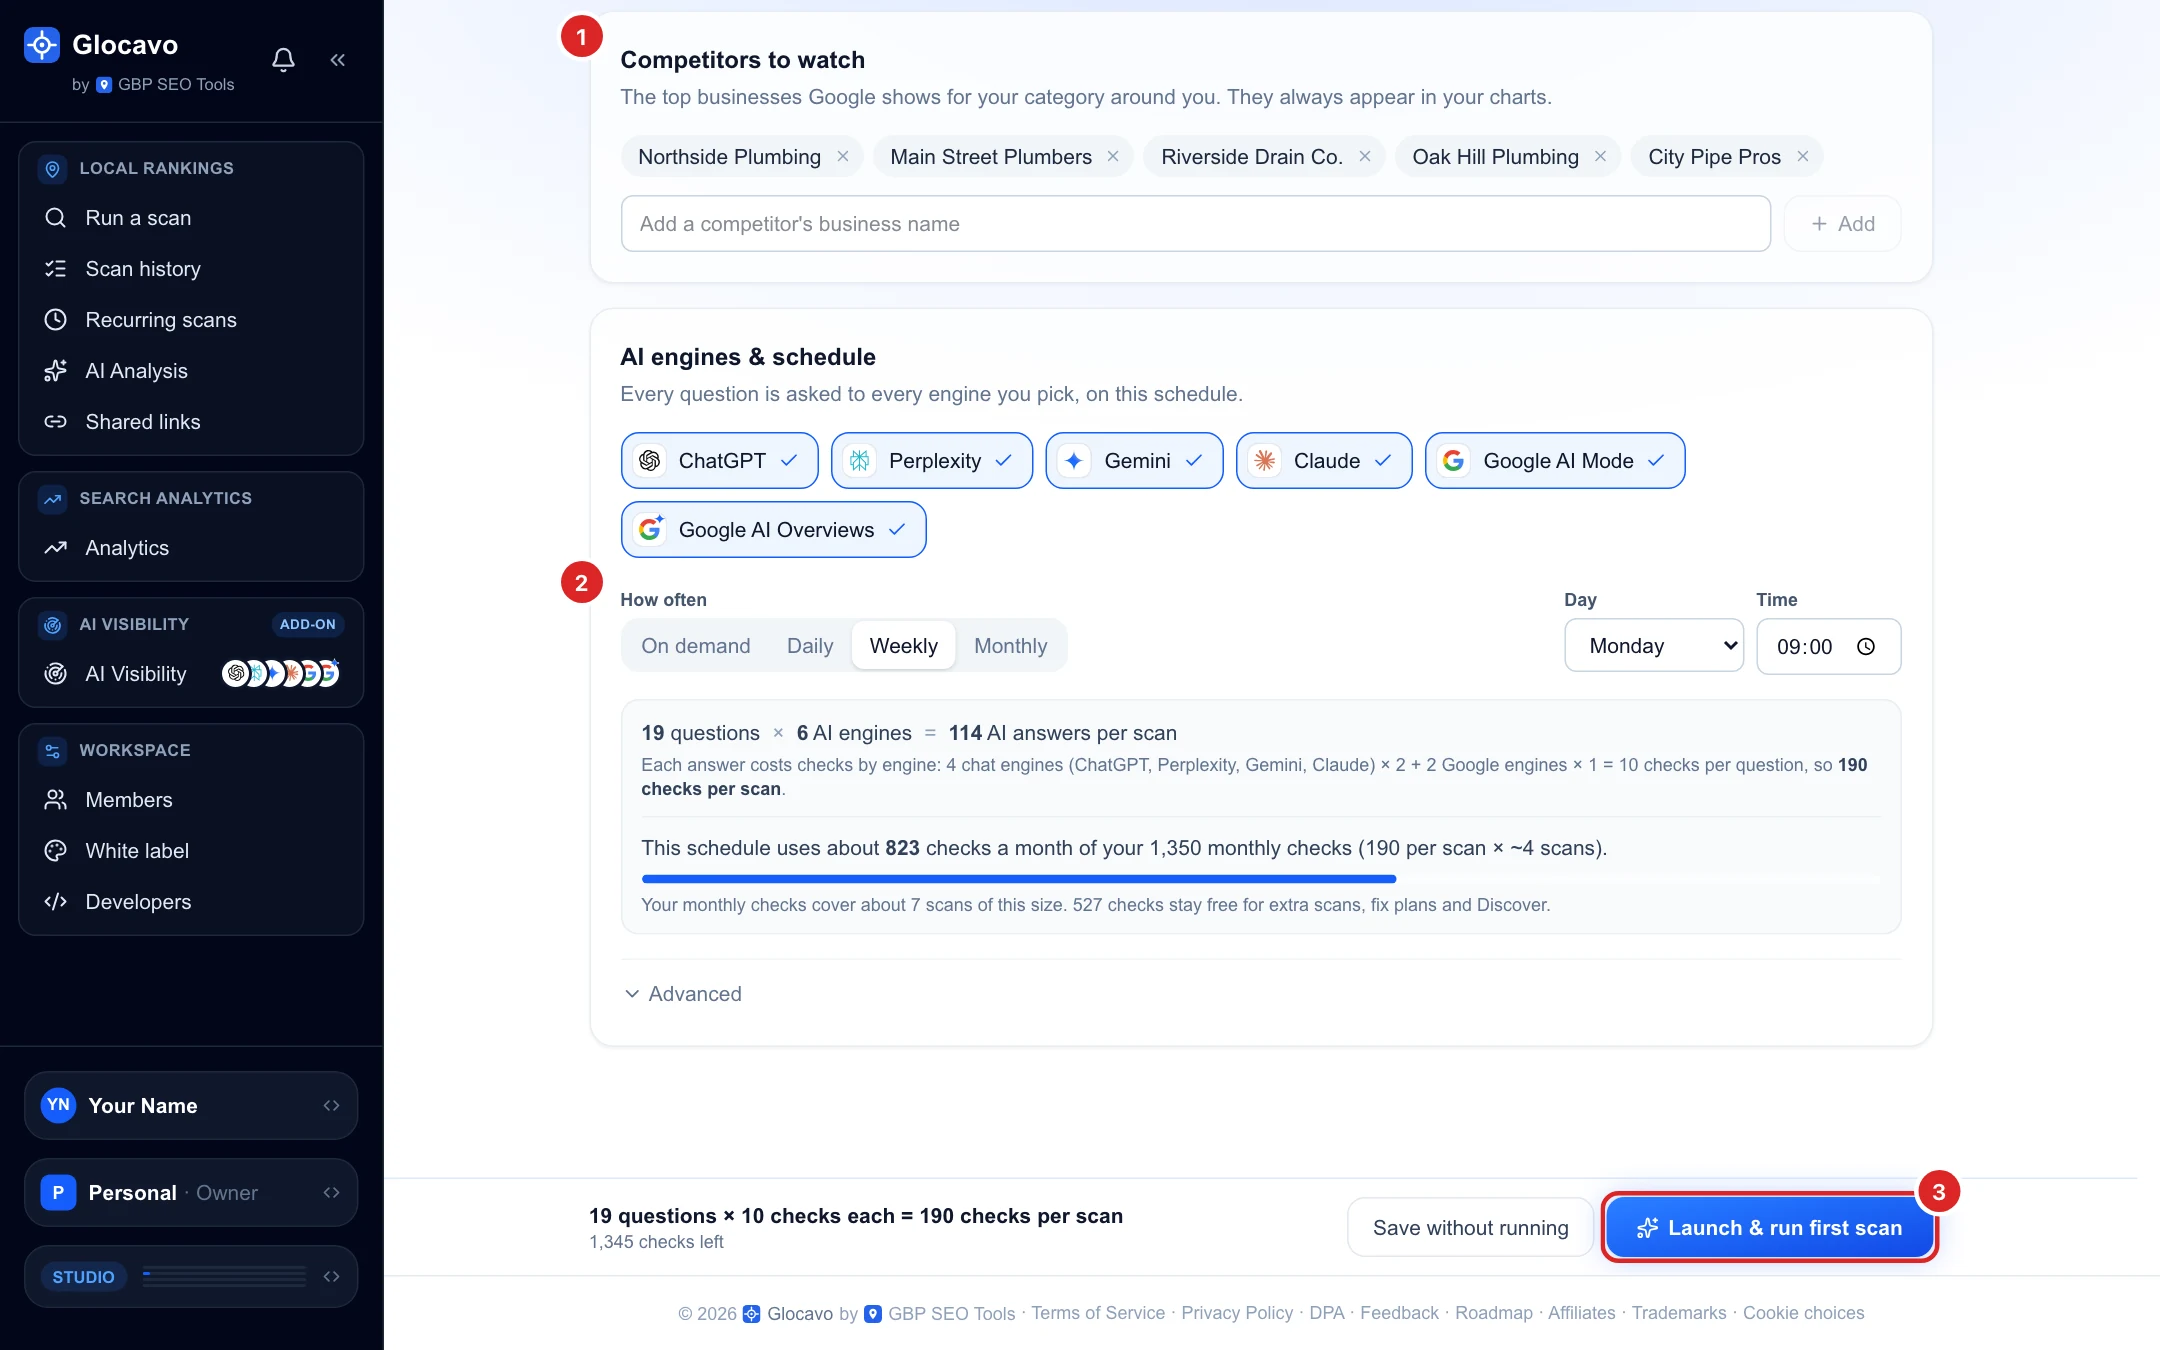
- Competitors to watch: the top businesses Google shows for your category around you. They always appear in your charts, even when AI rarely names them. Remove any with the × or add others by name (up to 10).
- AI engines & schedule: change the engines again if needed, then choose How often: On demand, Daily, Weekly or Monthly, with the day and time. The time is in the time zone of the computer you create the campaign on. The box below shows how many checks the schedule uses a month compared with your monthly checks.
- Advanced: ask each question once (recommended) or up to 3 times, and turn the email after each scheduled scan on or off.
The bar at the bottom shows the cost of one scan and your checks left. Click Launch & run first scan to start now, or Save without running to keep the campaign and run it later.
If one scan costs more checks than you have left, the Launch button stays disabled. Untick some questions or engines, or top up your checks from the AI Visibility page. If you already track the same business, the review page tells you and offers to open the existing campaign.
Wait for the first scan
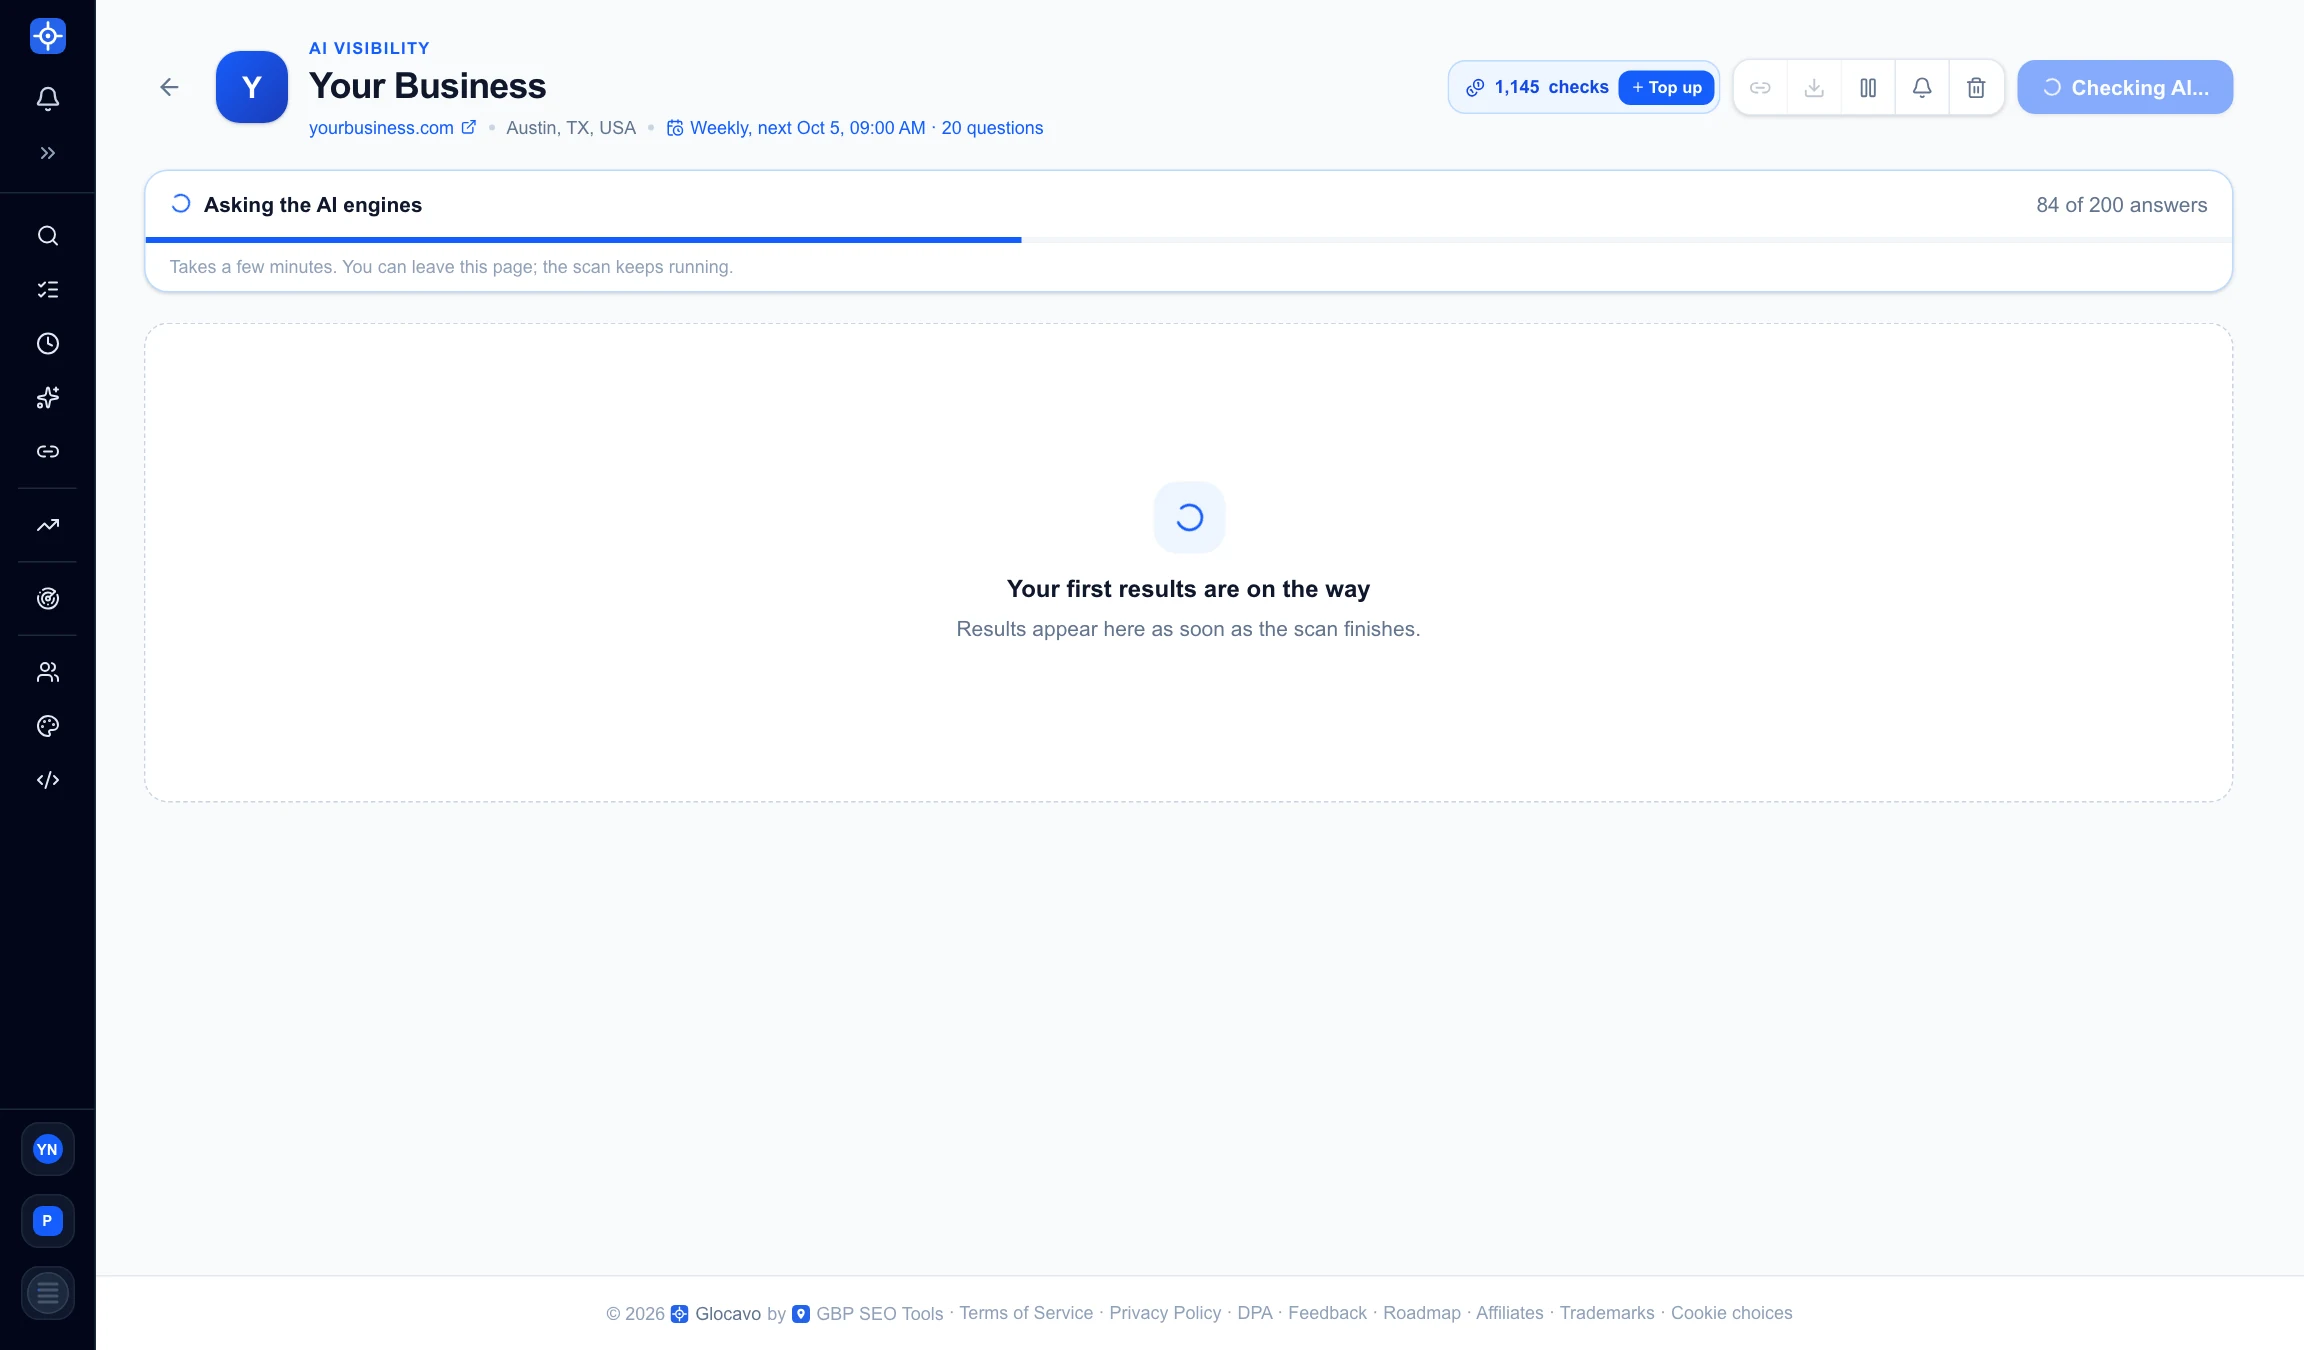
The campaign opens straight away and shows the scan’s progress (answers received out of the total). You can leave the page or close Glocavo: the scan keeps running and the results are there when you come back.
Read your first results
When the scan finishes, the Overview shows:
- Your AI score: the share of answers that name you, overall and per engine.
- How many answers named you, how many cited your website and your average position when named.
- Share of voice, sentiment, the competitors named and any wrong facts AI states about you (for example an old phone number).
- What to do and Where to look: your weakest engine, your biggest gap and your stronghold, plus the first fixes to make.
The side menu opens the detail: every prompt and answer, Changes and Progress over time, Competitors, Engines, Perception, Sources, AI readiness, Opportunities, Wrong facts and Settings. Use the engine and topic filters at the top to narrow every number to one slice.
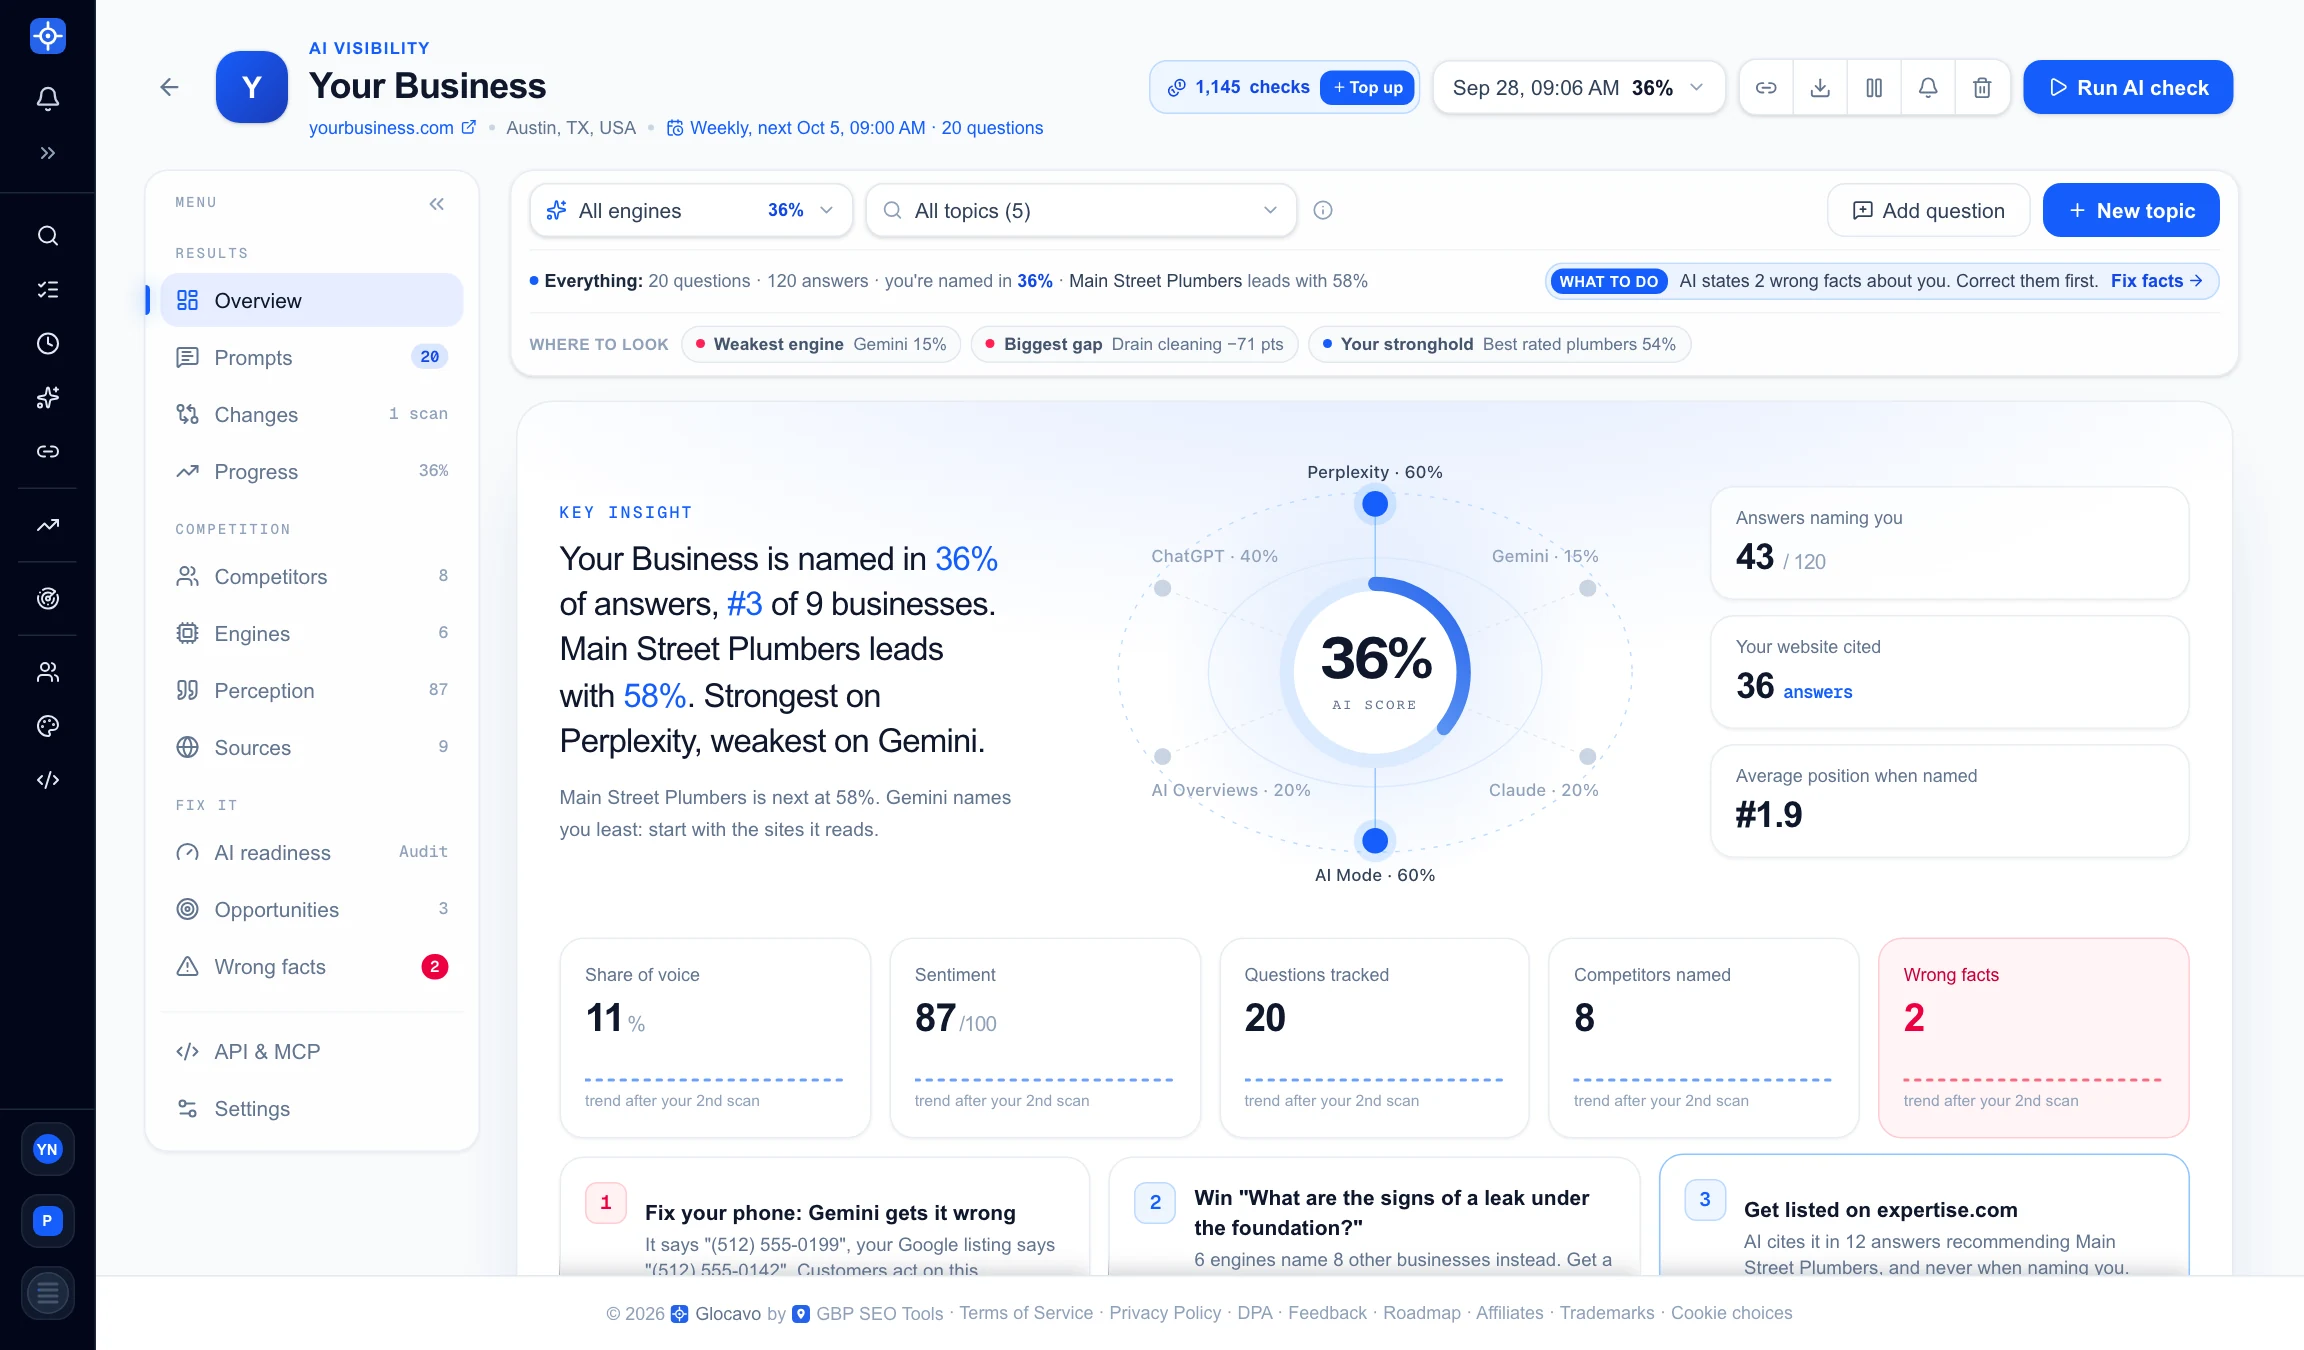
Every number and chart is explained in Read your AI Visibility Overview.
Check what the schedule will ask
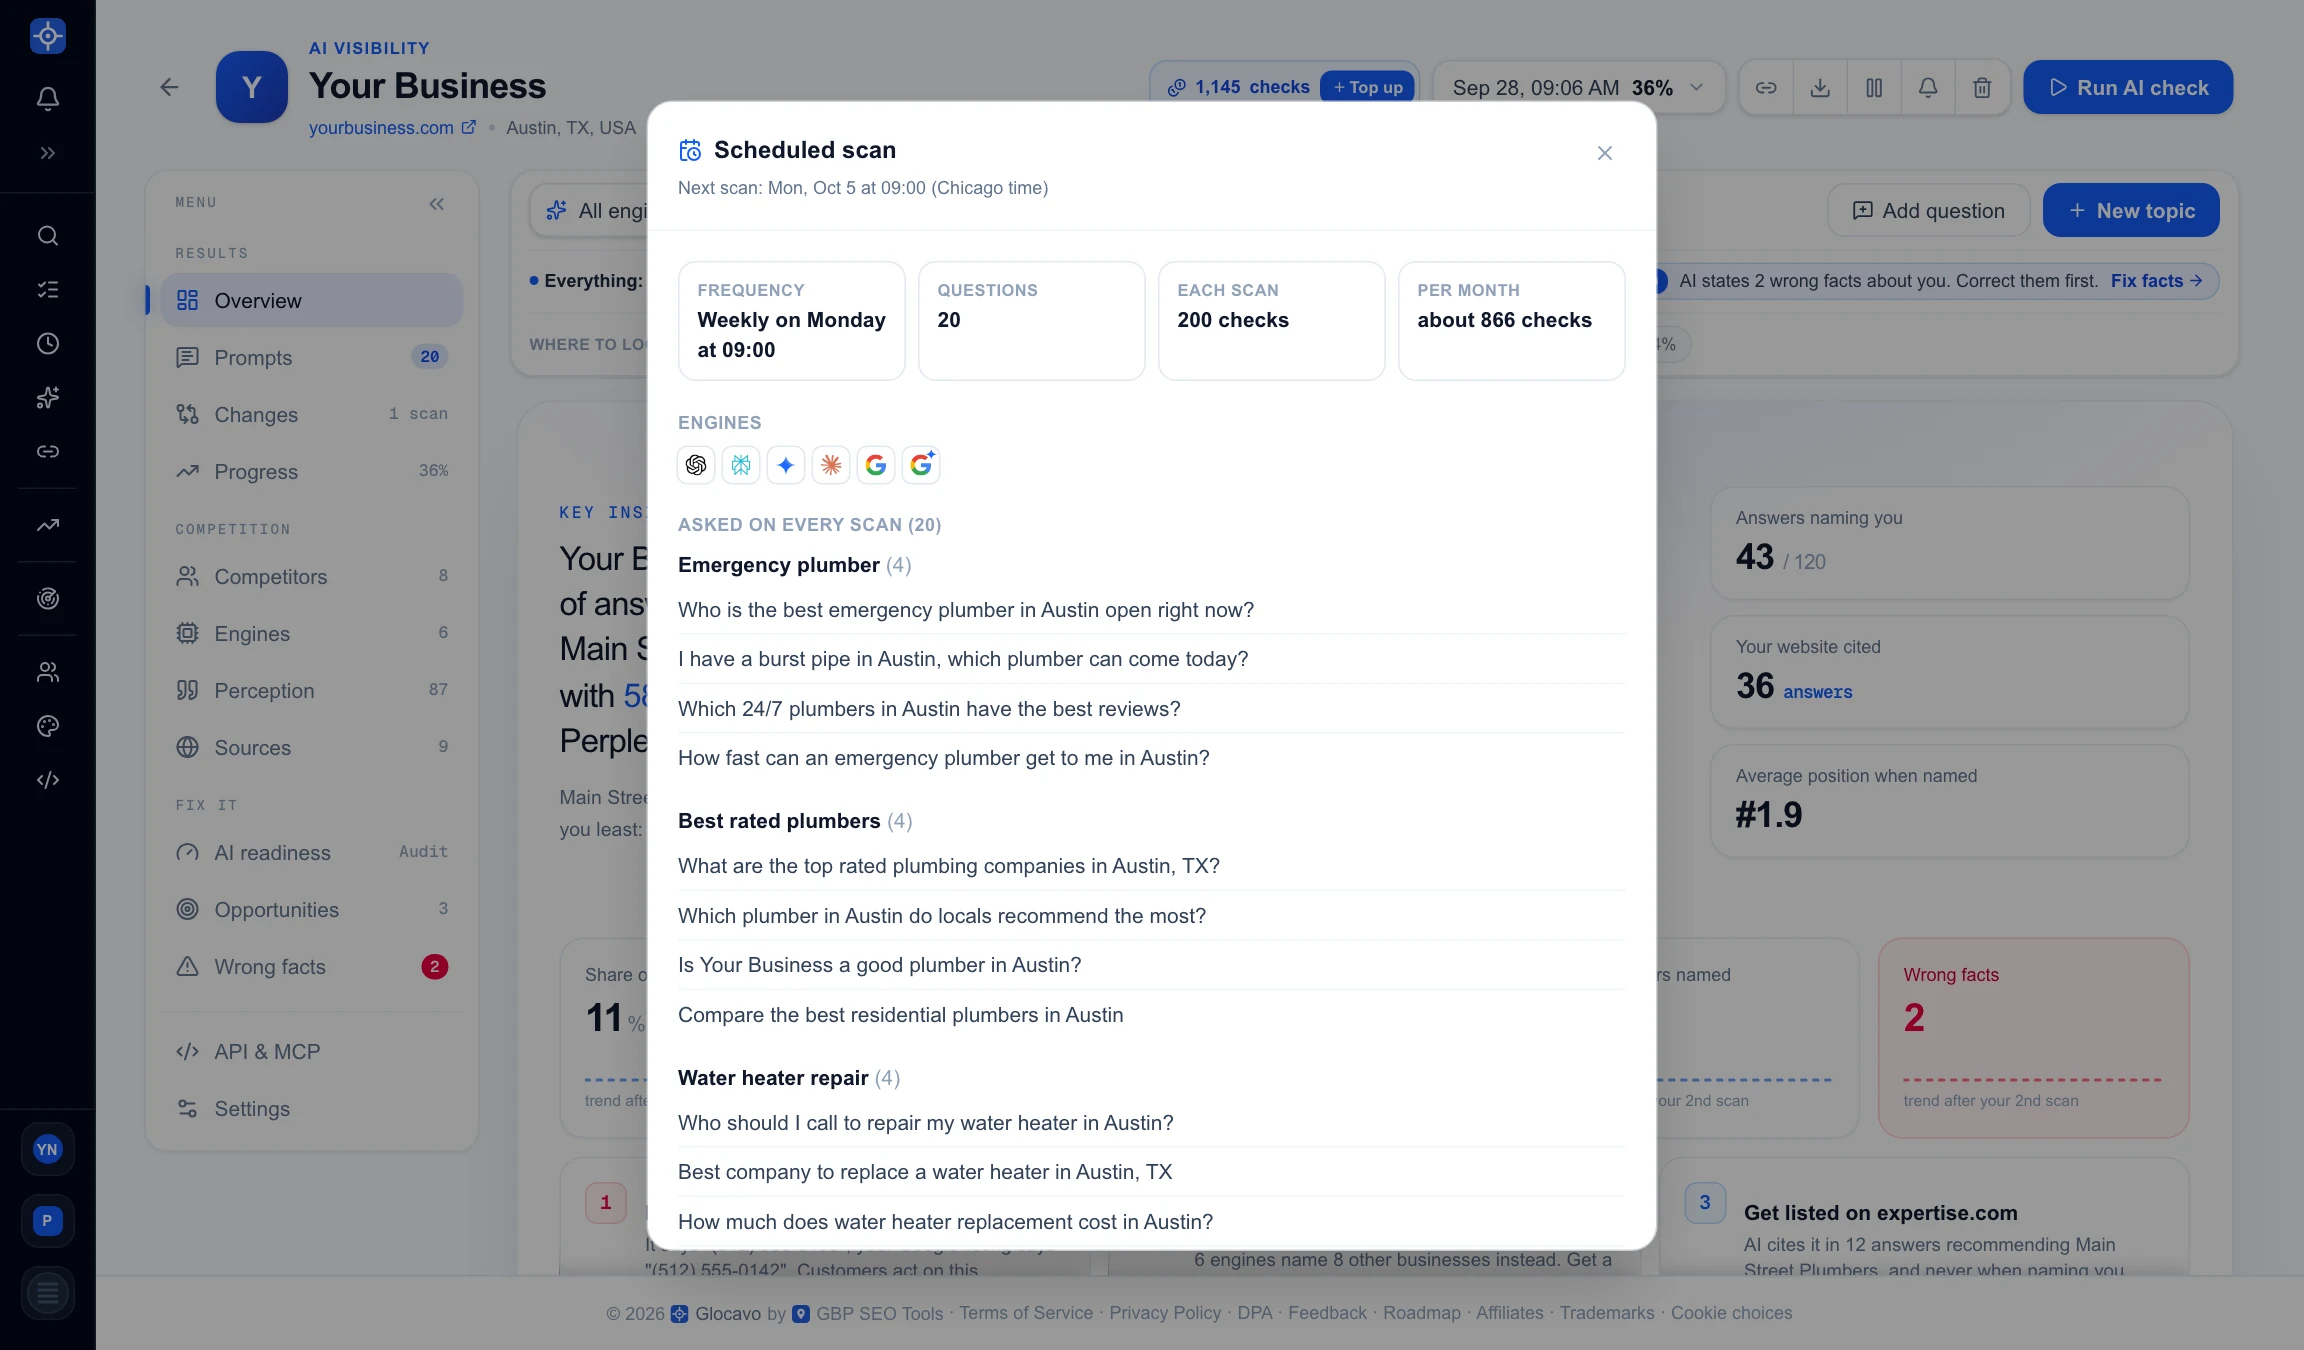
Under the business name, the schedule line (for example Weekly, next Oct 5, 09:00 AM) opens the Scheduled scan window: how often it runs, the next run, the cost of each scan and per month, the engines and every question it asks, grouped by topic. To change any of it, open Settings in the campaign’s side menu.
After each scheduled scan Glocavo emails you a summary with your score and what changed since the last scan, as long as the email option is on. Manual scans do not send an email.
Next
Ask Claude about your AI Visibility results in a chat with the MCP connector for Claude. On the $99.99 add-on level, or on the Studio and Agency plans, you can also create an API key to read your AI Visibility data from your own tools.