Integrations
Create a Glocavo API key
Generate a key for the Glocavo API and MCP server: name it, choose read or write access, optionally lock it to an IP, and copy it once.
Updated September 28, 2026 · 3 min read
An API key authenticates every request to the Glocavo REST API and the MCP server. Keys belong to one workspace and spend that workspace’s own scan credits, AI Power credits and AI Visibility checks.
On a plan without the full API, the AI Visibility add-on at the $99.99 level still gives you keys limited to AI Visibility. You create those in the AI Visibility section instead.
- Where
- Glocavo → Developers → API keys tab.
- Who
- Workspace owners and admins, on the Studio or Agency plan.
- Limits
- Up to 5 active keys per workspace, at most 2 of them with write access.
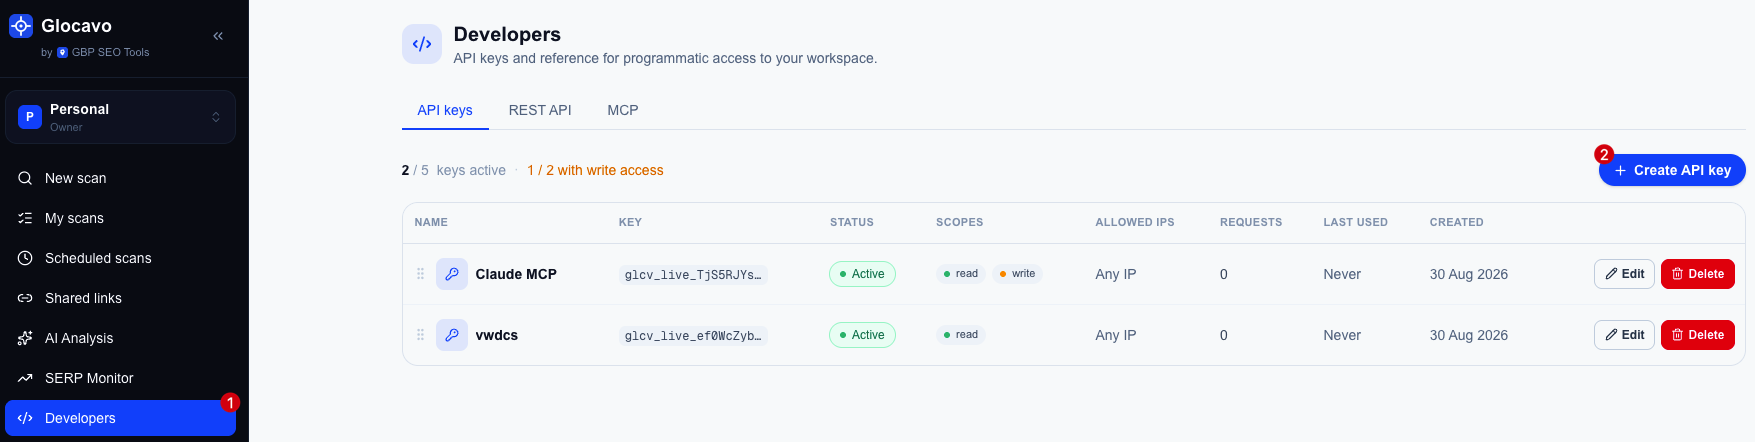
Open the API keys tab
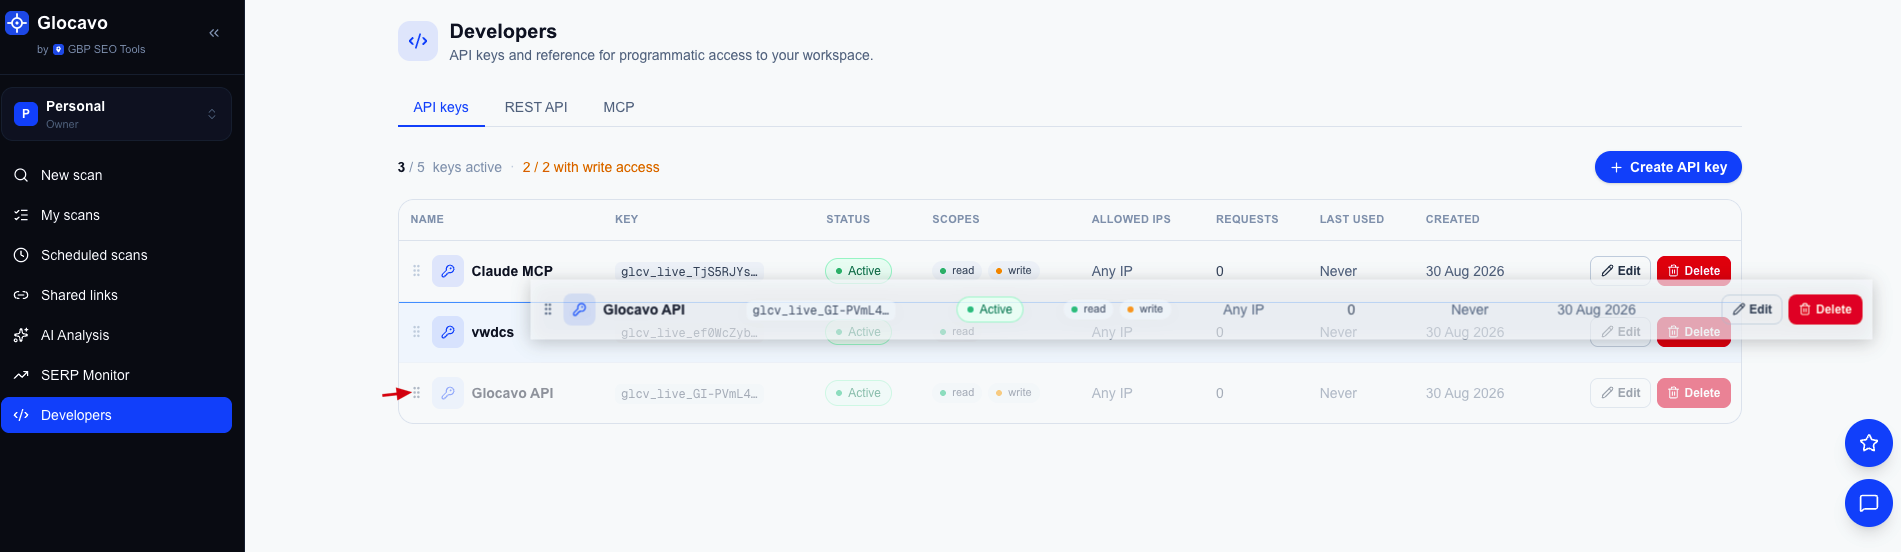
In Glocavo, click Developers in the left sidebar. The API keys tab lists any keys the workspace already has, with a counter for how many active and write-enabled keys you have left, and a Create API key button on the right.
Fill in the new key form
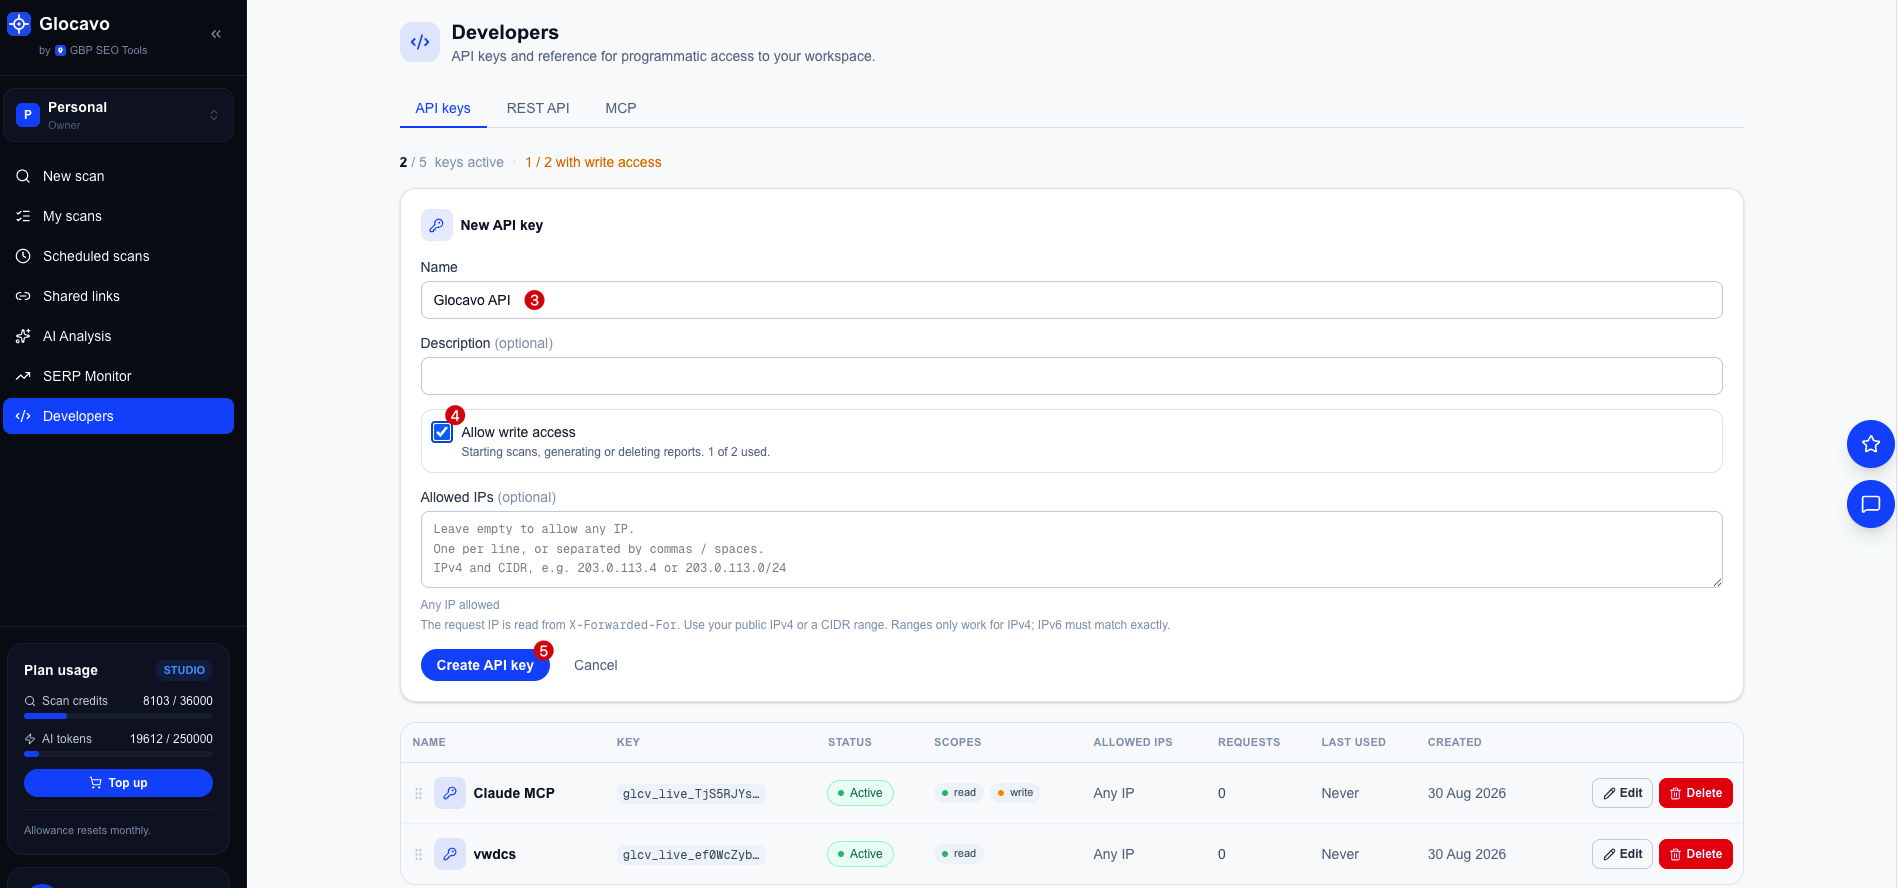
Click Create API key and set:
- Name (required): something you will recognize later, for example Claude MCP or Zapier.
- Description (optional): a note about where the key is used.
- Allow write access: leave off for a read-only key (list scans, poll status, read reports). Turn it on only if this key needs to start scans or generate and delete reports. Only 2 write keys are allowed per workspace.
- Allowed IPs (optional): one IPv4 address or CIDR range per line. Leave empty to allow any IP. Ranges only work for IPv4; an IPv6 address must match exactly.
Then click Create API key.
Copy the key once
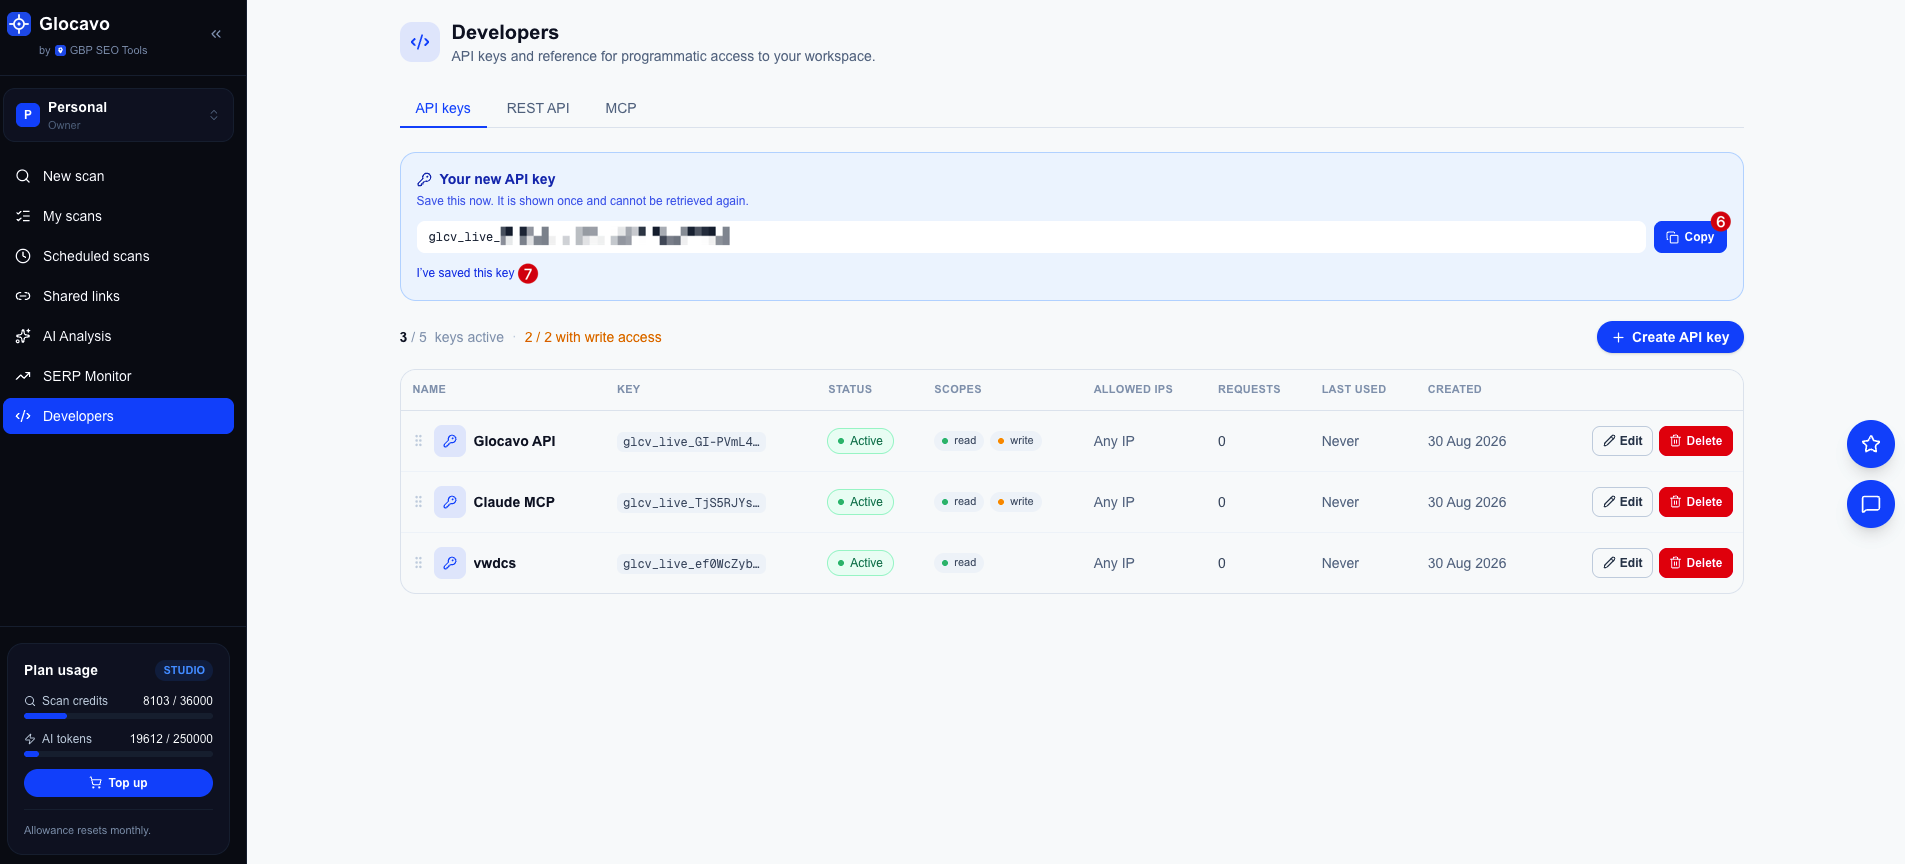
The full key is shown in a one-time banner. It starts with glcv_api_ and is displayed only this once: it cannot be retrieved again. Click Copy, paste it wherever it is needed, then click I’ve saved this key to dismiss the banner.
Treat the key like a password. Anyone who has it can spend your workspace’s credits. Use a separate key per integration so you can revoke one without breaking the others.
Manage the key later
The new key appears in the list with its prefix, status, scopes, allowed IPs, request count and last-used time. From each row you can Edit the name and allowed IPs, drag the handle to reorder, or Delete it. Deleting is permanent: the key stops working immediately and that exact value is never issued again.
Next
Use the key with the MCP connector for Claude, or send it as an x-api-key header to the REST API. The full REST reference is in Glocavo under Developers → REST API. For AI Visibility with Zapier, Make, n8n or Google Sheets, see Use AI Visibility data in Claude, Zapier and more.