Account & billing
Invite your team and manage workspaces
Invite teammates by email, choose who can do what, manage pending invites, and use separate workspaces for each client.
Updated October 11, 2026 · 4 min read
A workspace holds scans, recurring scans and campaigns. Everyone you invite to it sees and works on the same things, and uses the workspace owner’s credits. Agencies usually make one workspace per client.
The screenshots use made-up teammates and workspaces.
- Where
- Workspace → Members, and the workspace switcher at the bottom of the sidebar.
- Plans
- Teammates on Basic (up to 3), Studio (6) and Agency (12). Workspaces: 1 on Free and Starter, 3 on Basic, 6 on Studio, 12 on Agency.
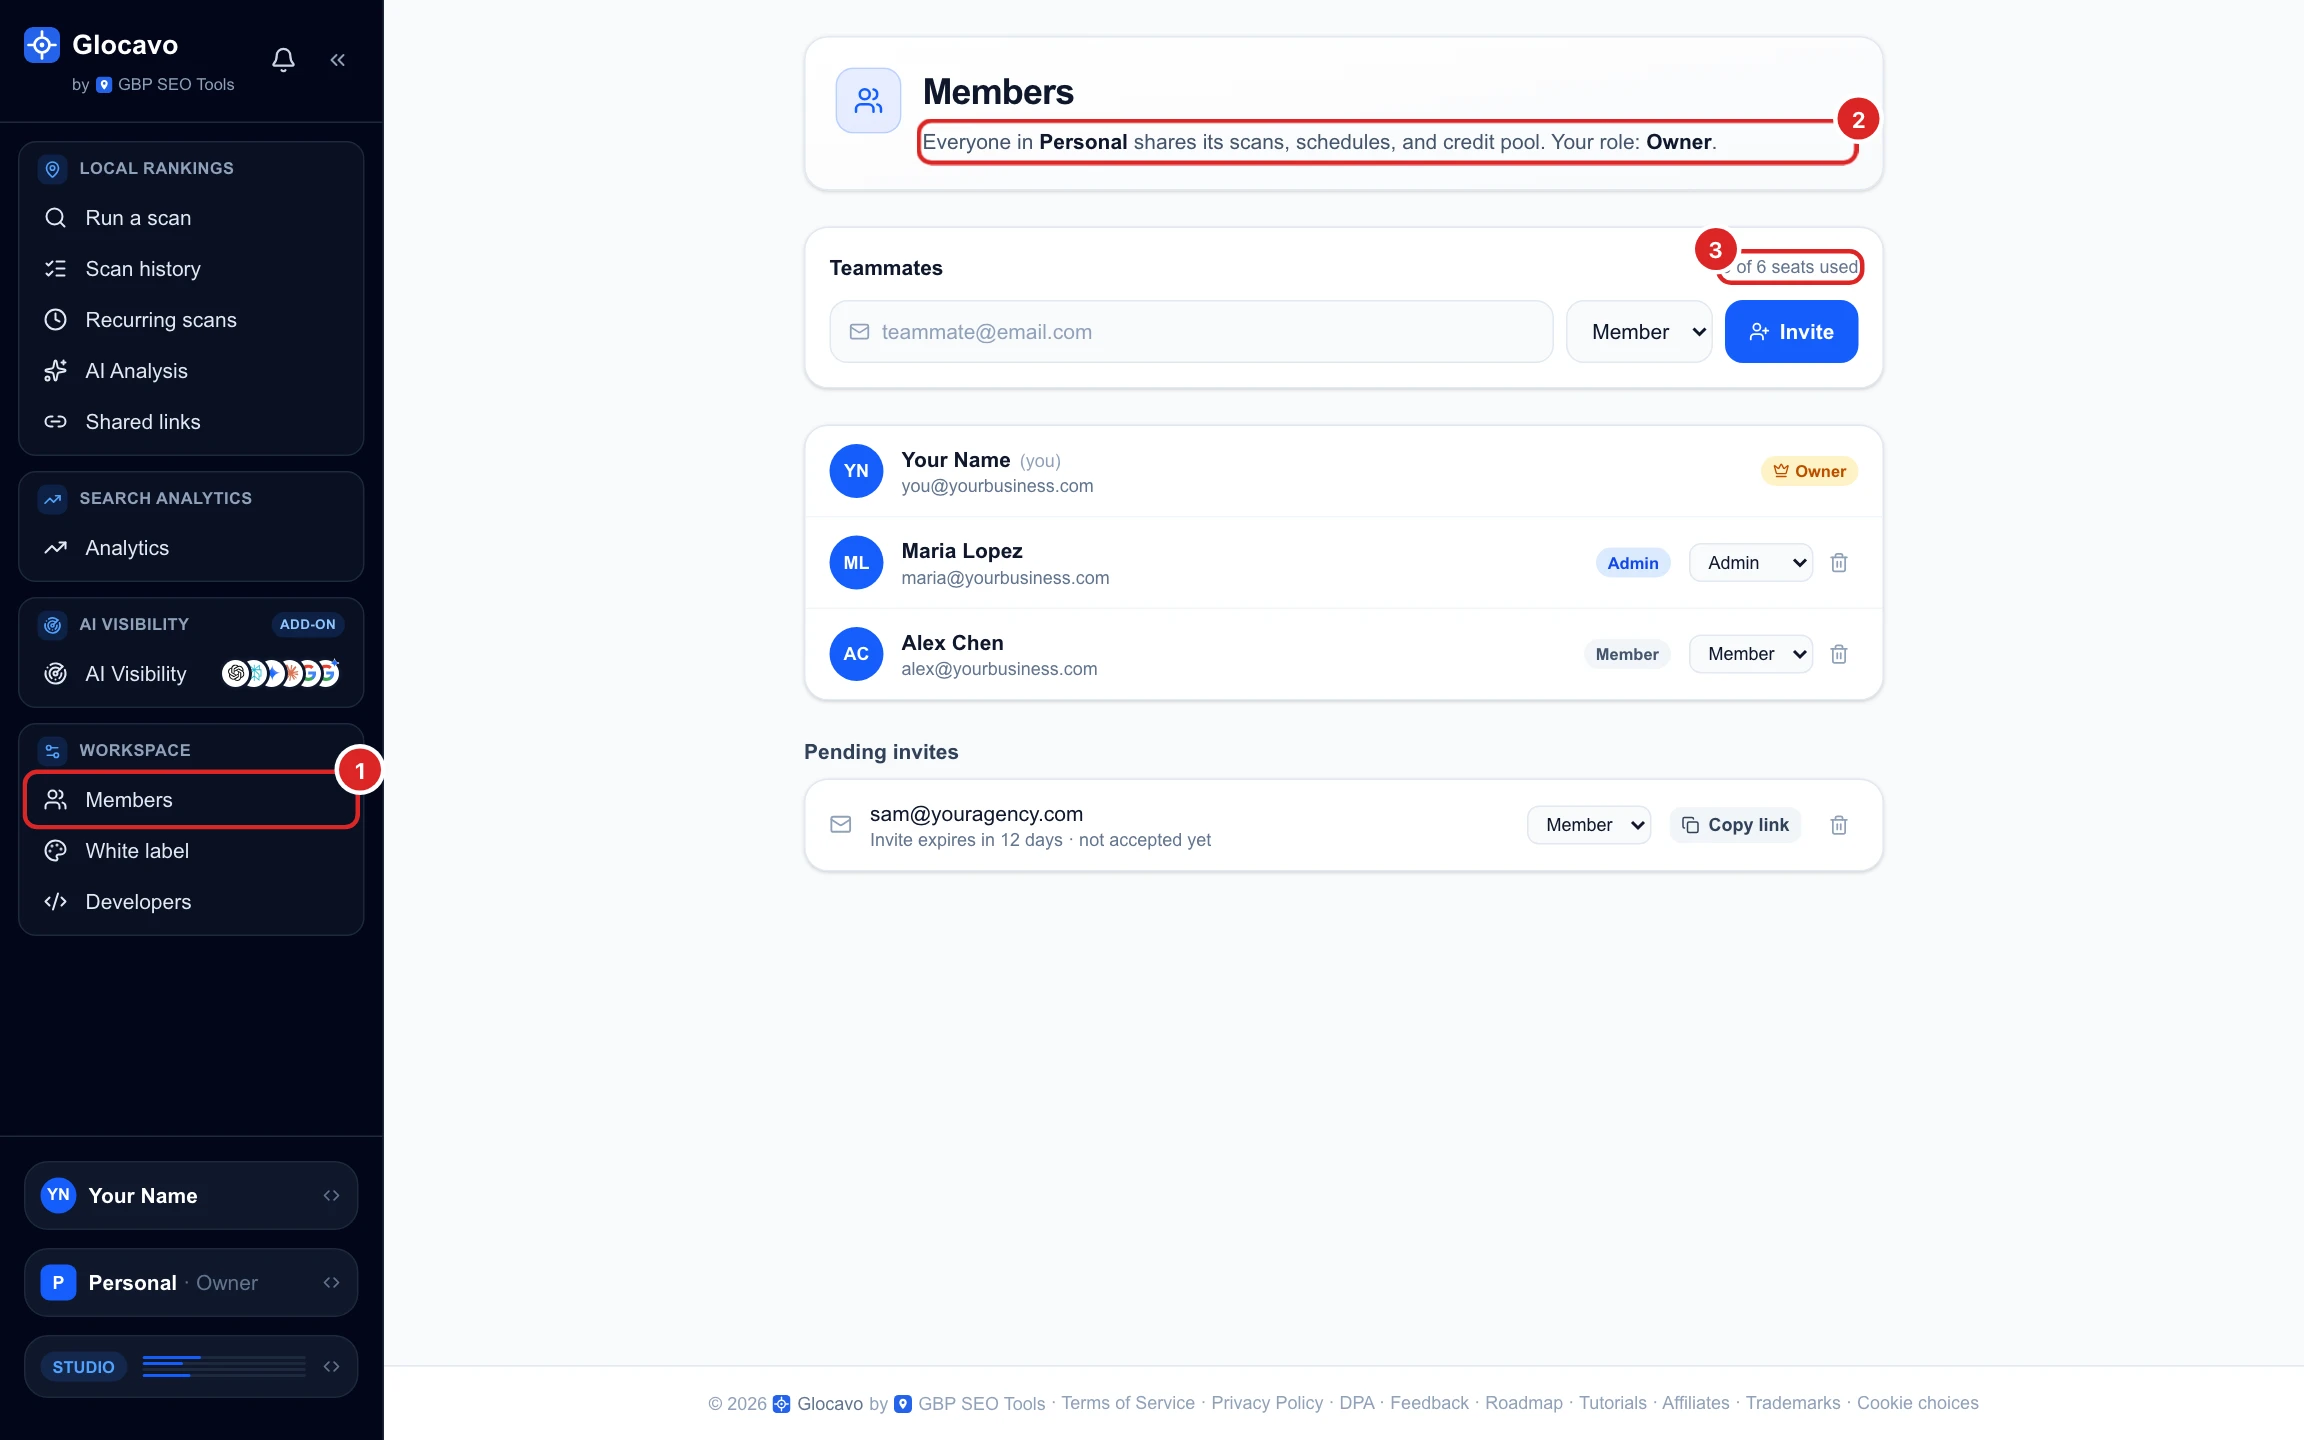
Open Members
Click Members in the sidebar. The top line tells you which workspace you’re in and your role there. Teammates shows how many seats you’ve used: teammates plus pending invites. You, the owner, don’t take a seat.
Invite a teammate
Type their email, pick a role and click Invite.

Glocavo emails them an invite. When they sign in with that email, with Google or a password, they join the workspace straight away. You can also click Copy invite link and send it yourself.
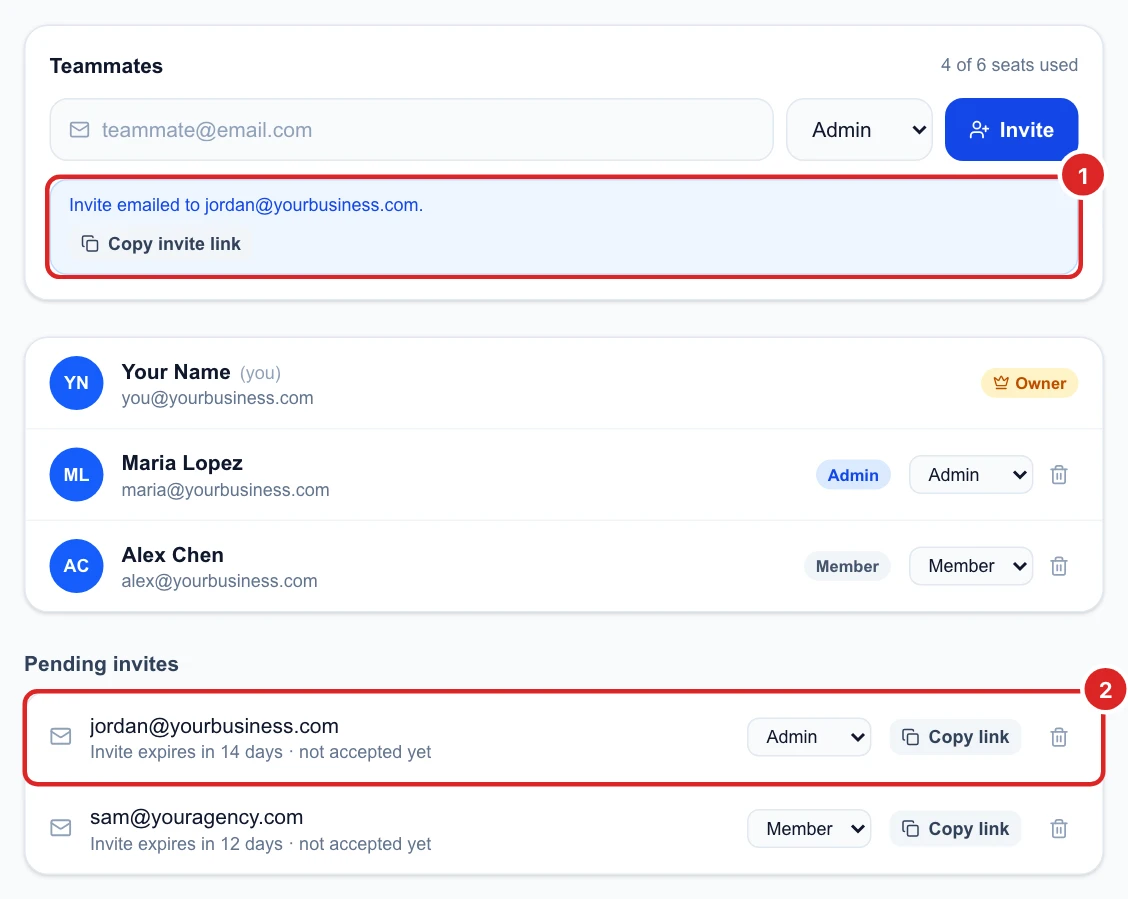
An invite lasts 14 days. Make sure they sign in with the same email you invited.
Pick the right role
- Owner: everything, including billing, the plan and deleting the workspace. One per workspace.
- Admin: invites and removes members, and works on every scan and schedule. No billing.
- Member: runs and views scans, schedules and reports. Can’t invite anyone or change billing.
Change a role or remove someone
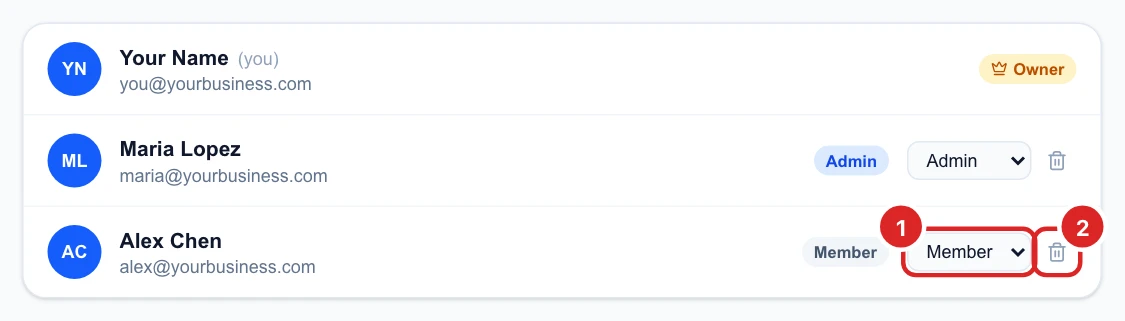
As the owner, change someone’s role with the menu on their row, or click the bin to remove them. An admin can remove members, but not other admins. Anyone who isn’t the owner can Leave a workspace from their own row.
Manage pending invites
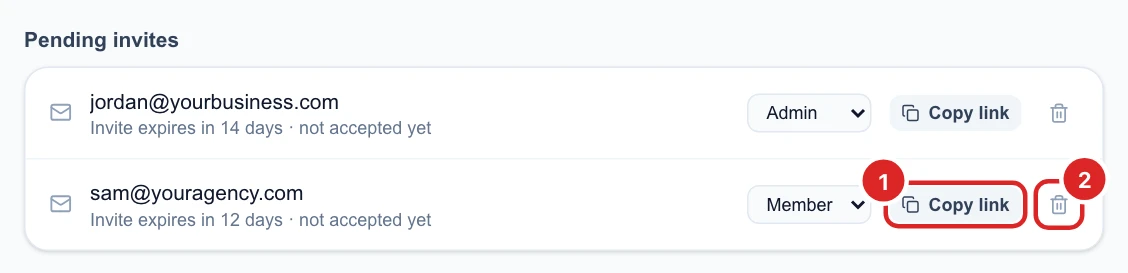
Under Pending invites, change the role before they accept, click Copy link to send the invite again, or click the bin to cancel it and free the seat.
Create and switch workspaces
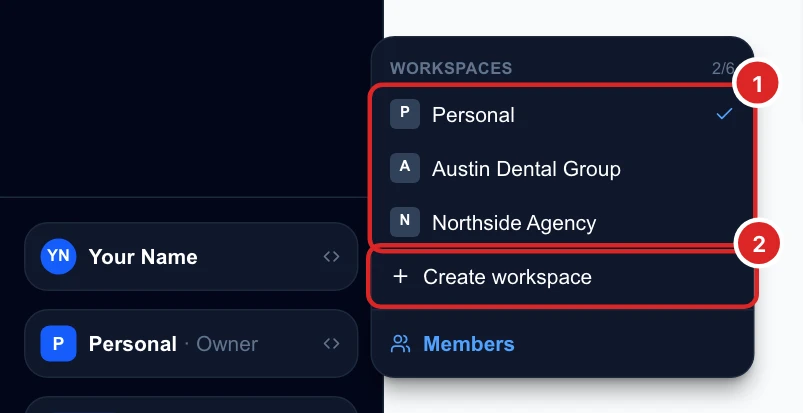
Click the workspace name at the bottom of the sidebar. The menu lists every workspace you belong to, with how many you own out of your plan’s limit (2/6 here). Click one to switch, or Create workspace to start a new one, for example for a new client.
- Each workspace has its own scans, recurring scans, campaigns and teammates.
- Credits are one pool for all the workspaces you own, see plans and top-ups.
- On a smaller plan, workspaces over its limit become read-only: everything stays viewable, but nothing new runs there until you upgrade.
Delete a workspace
Switch to the workspace, open Members and use Delete workspace at the bottom, then type its name to confirm. It removes every scan, schedule and invite in it, and its members lose access. Only the owner can do this, and your first workspace, Personal, can’t be deleted.